

Инструкция на Сплит-системы настенного типа Daikin серии Emura: FTXG20LV1BW, FTXG25LV1BW, FTXG35LV1BW, FTXG50LV1BW, FTXG20LV1BS, FTXG25LV1BS, FTXG35LV1BS, FTXG50LV1BS. Руководство по монтажу.
Смотрите также: Руководство по эксплуатации →
Загружаем документ…
Текст инструкции
-
DAIKIN ROOM AIR CONDITIONER
-
CE - DICHIARAZIONE-DI-CONFORMITA CE - ∆HΛΩΣΗ ΣΥΜΜΟΡΦΩΣΗΣ CE - ERKLÆRING OM-SAMSVAR CE - ILMOITUS-YHDENMUKAISUUDESTA CE - PROHLÁŠENÍ-O-SHODĚ as set out in <A> and judged positively by <B> according to the Certificate <C>. wie in <A> aufgeführt und von <B> positiv beurteilt gemäß Zertifikat <C>. tel…
-
Safety Precautions
• The precautions described herein are classified as WARNING and CAUTION. They both contain important information regarding safety. Be sure to observe all precautions without fail. • Meaning of WARNING and CAUTION notices WARNING Failure to follow these instructions properly may result in personal…
-
Safety Precautions
CAUTION • Do not install the air conditioner at any place where there is a danger of flammable gas leakage. In the event of a gas leakage, build-up of gas near the air conditioner may cause a fire to break out. • While following the instructions in this installation manual, install drain piping to…
-
Indoor Unit Installation Drawings
n How to attach the indoor unit A Mounting plate A Mounting plate Hook the claws of the bottom frame to the mounting plate. If the claws are difficult to hook, remove the front grille. Clip Front grille The mounting plate should be installed on a wall which can support the weight of the indoor unit.…
-
Installation Tips
1. Removing and installing the upper front panel ■ Removal method 1) Open the upper front panel. 2) Slide the front panel locks on the back of the front panel upward to release the locks (left and right sides). 3) Remove the panel shafts on both sides from the shaft holes, and dismount the upper…
-
7) Wear protection gloves and insert both hands
under the front grille as shown in the figure. 8) Remove the front grille from the 3 upper hooks by pushing up the top side of the front grille, pull the front grille toward you by holding both ends of the front grille, and dismount the front grille. • If the grille is hard to remove, insert a long…
-
Installation Tips
• Attachment methods of connection cord 1) Remove the factory-mounted connector from S21. 2) Tie the harnesses in a bundle as shown in the figure so that the removed connector does not interfere with the printed circuit board. 3) Attach the connection cord to the S21 connector and pull the harness…
-
Refrigerant Piping Work
2. Refrigerant piping CAUTION • Use the flare nut fixed to the main unit. (To prevent cracking of the flare nut by aged deterioration.) • To prevent gas leakage, apply refrigeration oil only to the inner surface of the flare. (Use refrigeration oil for R410A.) • Use torque wrenches when tightening…
-
1. Installing the mounting plate
The mounting plate should be installed on a wall which can support the weight of the indoor unit. 1) Temporarily secure the mounting plate to the wall, make sure that the unit is completely level, and mark the boring points on the wall. 2) Secure the mounting plate to the wall with screws.…
-
4. Laying piping, hoses, and wiring
• The recommended installation method is back piping. • When performing bottom piping or side piping, refer to “5. Bottom or side piping” on page 10. Bind refrigerant pipe and drain hose together with adhesive vinyl tape. 4-1. Right-back piping 1) Attach the drain hose to the underside of the…
-
9) While exercising care so that the inter-unit wire does not catch the
indoor unit, press the bottom edge of indoor unit with both hands until it is firmly caught by the mounting plate hooks. Secure indoor unit to the mounting plate with indoor unit fixing screws (M4 × 12L). Inter-unit wire A Mounting plate Drain hose Refrigerant pipes Bottom frame F Indoor unit fixing…
-
6. Wiring
With a multi indoor unit , install as described in the installation manual supplied with the multi outdoor unit. 1) Strip wire ends (15mm). 2) Match wire colours with terminal numbers on indoor and outdoor unit’s terminal blocks and firmly screw wires to the corresponding terminals. 3) Connect the…
-
Wiring diagram parts table
A1P~A3P Printed circuit board CAUTION BZ Buzzer Note that operation will restart automatically if the main power supply is turned off and then back on again. FG Frame ground FU1,FU2 Fuse H1P,H2P Pilot lamp M1F Fan motor M1S,M2S,M3S Swing motor HIGH VOLTAGE – be sure to discharge the capacitor…
-
Trial Operation and Testing
1. Trial operation and testing 1-1 Measure the supply voltage and make sure that it falls in the specified range. 1-2 Trial operation should be carried out in either cooling or heating mode. In cooling mode, select the lowest programmable temperature; in heating mode, select the highest programmable…
-
3P358178-1B 2014.08
Copyright 2014 Daikin
Схемы, таблицы и рисунки — в просмотре документа выше. Клик по номеру страницы открывает её в просмотре.
Новое в каталогах
-

Каталог продукции Веза 2025 - Пункт тепловой индивидуальный БАЗИС, узел регулирующий ВЕКТОР. pdf, 8.85 Mb
Каталог индивидуальных тепловых пунктов БАЗИС, узлов регулирующих ВЕКТОР и блочных тепловых пунктов: назначение, схемы, комплектация, технические характеристики, габаритные размеры. -

Каталог продукции Веза 2024 - Регуляторы переменного расхода воздуха РЕГ-СМАРТ для VAV-систем. pdf, 1.83 Mb
Каталог регуляторов переменного расхода воздуха РЕГ-СМАРТ для VAV-систем: назначение, конструкция, исполнения, технические характеристики, габаритные размеры, обозначение при заказе. -
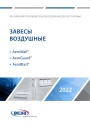
Каталог продукции Веза 2025 - Воздушные завесы. pdf, 4.97 Mb
Каталог воздушных завес Веза AeroWall, AeroGuard, AeroBlast: назначение, конструкция и исполнения, технические характеристики, габаритные размеры, подбор.
Новое в инструкциях
-
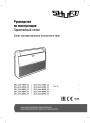
Полупромышленные напольно-потолочные сплит-системы Shuft серии SFLC_CF. pdf, 8.93 Mb
Модели: SFLC_CF/in-18…60HN1_V2, SFLC_CF/out-18…60HN1_V2. Руководство по эксплуатации: устройство, проводной пульт, монтаж, электрические схемы подключения, размеры, технические характеристики, устранение неисправностей, протоколы приёмки и тестового запуска, гарантийный талон. -
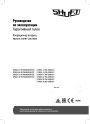
Мульти-сплит-системы Shuft серии FMI. pdf, 4.82 Mb
Модели: внутренние блоки SFMS/I-07…18 HB FMI/N8/IN/WHITE, наружные SFMO/I-14…42 FMI-2…5/N8/OUT. Руководство по эксплуатации: технические характеристики, управление кондиционером, монтаж, техническое обслуживание, поиск и устранение неисправностей, возможная комплектация блоков, гарантийный талон. -
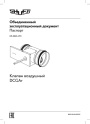
Воздушные клапаны Shuft серии DCGAr. pdf, 4.57 Mb
Паспорт (объединённый эксплуатационный документ) круглых воздушных клапанов DCGAr: назначение, описание, комплектация, характеристики, размеры и вес, монтаж и эксплуатация, обслуживание, гарантия.