

Инструкция на Полупромышленные кондиционеры Digital Inverter
Полупромышленные кондиционеры Digital Inverter. Подпотолочные (консольные) блоки RAV-SM562XT-E / RAV-SM562AT-E, RAV-SM802XT-E / RAV-SM802AT-E. Инструкция по обслуживанию и ремонту.
Смотрите также: Инструкция по обслуживанию и ремонту →
Загружаем документ…
Текст инструкции
-
SERVICE MANUAL
-
1. SPECIFICATIONS
1-1. Indoor Unit (Flexi Type) Model Indoor unit RAV-SM562XT-E RAV-SM802XT-E Outdoor unit RAV-SM562AT-E RAV-SM802AT-E (kW) 5.0 6.7 (kW) 5.6 8.0 (A) 8.95-8.20 13.15-12.06 Power consumption (kW) 1.87 2.72 Power factor (%) 95 94 (W/W) 2.67 2.46 D E Cooling capacity Heating capacity Power supply…
-
• Operation characteristic curve
-
2. CONSTRUCTION VIEWS
2-1. Indoor Unit Front panel 208 633 1093 Knock out system Grille air inlet Back body 200 Min 1093 1015 742 450 For stud bolt (Ø6) 20 Installation plate Mount plate Min Ø M10 Suspention bolt 160 For stud bolt (Ø8 – Ø10) UNDER CEILING & CONSOLE INSTALLATION –3– 57 18 Wireless remote control Knock out…
-
3. SYSTEMATIC REFRIGERATING CYCLE DIAGRAM
3-1. RAV-SM562XT-E / RAV-SM802XT-E Indoor unit TCJ sensor Air heat exchanger TC sensor Model Outer diameter of refrigerant pipe RAV-SM Gas side ∅A Liquid side ∅ B 562XT-E 12.7 mm 6.4 mm 802XT-E 15.9 mm 9.5 mm Refrigerant pipe at liquid side Outer dia. ∅B Refrigerant pipe at gas side Outer dia. ∅A…
-
4. WIRING DIAGRAM
Indoor Unit HEAT EXCHANGER SENSOR (TCJ) SWITCH PCB MCC-1428B CN101 WHI GRY GRY FOR FLOAT SWITCH (OPTION) When you use float switch you should cut J401 INFRARED RAYS RECEIVE AND INDICATION PARTS CN402 1 2 CN100 WHI BLU BLU BLU BLU BLU BLU BLU BLU BLU CN25 CN13 CN05 1 2 CN03 POWER SUPPLY CIRCUIT 4…
-
5. SPECIFICATION OF ELECTRICAL PARTS
-
6. REFRIGERANT R410A
This air conditioner adopts the new refrigerant HFC (R410A) which does not damage the ozone layer. The working pressure of the new refrigerant R410A is 1.6 times higher than conventional refrigerant (R22). The refrigerating oil is also changed in accordance with change of refrigerant, so be careful…
-
Table 6-2-1 Thicknesses of annealed copper pipes
Thickness (mm) Nominal diameter Outer diameter (mm) R410A R22 1/4 6.35 0.80 0.80 3/8 9.52 0.80 0.80 1/2 12.70 0.80 0.80 5/8 15.88 1.00 1.00 (2) Joints For copper pipes, flare joints or socket joints are used. Prior to use, be sure to remove all contaminants. a) Flare joints Flare joints used to…
-
Table 6-2-3 Dimensions related to flare processing for R410A
-
6° to 4 43° to 4 5° Fig. 6-2-2 Relations between flare nut and flare seal surface (2) Flare connecting procedures and precautions a) Make sure that the flare and union portions do not have any scar or dust, etc. When it is strong, the flare nut may crack and may be made non-removable. When choosing…
-
6-3. Tools
6-3-1. Required tools The service port diameter of packed valve of the outdoor unit in the air conditioner using R410A is changed to prevent mixing of other refrigerant. To reinforce the pressure-resisting strength, flare processing dimensions and opposite side dimension of flare nut (For ∅12.70…
-
6-4. Recharging of Refrigerant
When it is necessary to recharge refrigerant, charge the specified amount of new refrigerant according to the following steps. Recover the refrigerant, and check no refrigerant remains in the equipment. When the compound gauge’s pointer has indicated -0.1 Mpa (-76 cmHg), place the handle Low in the…
-
1 Be sure to make setting so that liquid can be charged
2 When using a cylinder equipped with a siphon, liquid can be charged without turning it upside down. It is necessary for charging refrigerant under condition of liquid because R410A is mixed type of refrigerant. Accordingly, when charging refrigerant from the refrigerant cylinder to the equipment…
-
(2) Characteristics required for flux
• Activated temperature of flux coincides with the brazing temperature. • Due to a wide effective temperature range, flux is hard to carbonize. • It is easy to remove slag after brazing. • The corrosive action to the treated metal and brazing filler is minimum. • It excels in coating performance and…
-
7. CONTROL BLOCK DIAGRAM
Indoor Unit Control Panel M.C.U. 8 MHz Heat Exchanger Sensor (TCJ) Heat Exchanger Sensor (TC) Temperature Sensor Initiallizing Circuit 36.7 kHz Hi POWER Display • 3-minute Delay at Restart for Compressor FILTER Sign Display • Motor Revolution Control Infrared Rays Signal Receiver Infrared Rays…
-
8. OPERATION DESCRIPTION
8-1. When power supply is reset 8-3. Air volume control (1) Distinction of outdoor units When the power supply is reset, the outdoors are distinguished, and control is exchanged according to the distinguished result. (1) Operation with [HIGH (H)], [MED (M)], [LOW (L)], or [AUTO] mode is performed by…
-
<HEAT>
8-4. Cool air discharge preventive control (Room temp.) − (Preset temp.) Preset temp. °C 0 −0.5 −1 −1.5 −2 In heating operation, the indoor heat exchanger restricts revolving speed of the fan motor to prevent a cold draft. The upper limit of the revolving speed is shown in Fig. 8-4-1 and Table…
-
8-5. Freeze preventive control (Low
temperature release) 8-7. Louver control The cooling operation (including Dry operation) is performed as follows based on the detected temperature of Tc sensor or Tcj sensor. When [J] zone is detected for T1 minutes (Following figure), the commanded frequency is decreased from the real operation…
-
8-9. Auto Restart Function
8-9-1. How to set auto restart function The indoor unit is equipped with an automatic restarting function which allows the unit to restart operating with the set operating conditions in the event of power supply being accidentally shut down. The operation will resume without warning three minutes…
-
8-9-2. How to cancel auto restart function
To cancel auto restart function, proceed as follows: Repeat the setting prodedure: the unit receives the signal and beeps three times. The unit will be required to be turned on with the remote control after the main power supply is turned off. When the unit is on standby (Not operating) Operation…
-
9. TROUBLESHOOTING
9-1. Summary of Troubleshooting 9-1-2. Troubleshooting procedure 9-1-1. Before troubleshooting When a trouble occurred, check the parts along with the following procedure. (1) Required tools/instruments • e and d screwdrivers, spanners, radio cutting pliers, nippers, etc. • Tester, thermometer…
-
9-2. Self-Diagnosis by Remote Control
(Check Code) (1) If the lamps are indicated as shown 00 to 03 in Table 9-1-1, exchanger the self-diagnosis by the remote control. (2) When the remote control is set to the service mode, the indoor controller diagnoses the operation condition and indicate the information of the self-diagnosis on the…
-
Table 9-2-1
Operation of diagnostic function Check code Block Check code Unit status Symptom Condition Judgement and action The indoor thermo sensor (TA) is defective. Disconnection or short-circuit Operation continues. The lamp on the indoor unit blinks when error is defected. 1. Check the indoor thermo sensor…
-
Table 9-2-2
Operation of diagnostic function Block Check code [MODE] [TIMER] lamp 5Hz flash Condition The serial signal is not output from outdoor unit to indoor unit. • Miscabling of inter-unit cables • Defective serial sending circuit on outdoor P.C. board • Defective serial receiving circuit on outdoor P.C.…
-
Table 9-2-3
Operation of diagnostic function Check code Symptom Unit status Condition Judgement and action Inverter over-current protective circuit operates. (For a short time) All stop Displayed when error is detected 1. Inverter immediately stops even if restarted. • Compressor rare short 2. Check IPDU. •…
-
Relational graph of temperature sensor resistance value and temperature
-
10. DETACHMENTS
10-1. Indoor Unit No. Part name 1 Air Inlet grille Procedures Remarks <How to remove the Air inlet grille> 1) Stop the operation of the Air conditioner and turn off its main power supply. 2) Open the Air inlet grille with both hands. Air inlet grille 3) Unfasten 3 screws (about two to three rounds)…
-
Part name Front panel Procedures Remarks <How to remove the Front panel> 1) Remove the Air inlet grille. (1) 2) In case of the Drain hose is installed through the Front panel. : Remove the Drain band from the Front panel. : Cut away the Opening base for piping from Front panel and keep parts. Drain…
-
Part name Front panel Procedures Remarks 6) Remove both side hooks and remove the Front panel by turn to air inlet part direction. Hook <How to install the Front panel> 1) In case of the Drain hose installation through the Front panel, install the opening base for piping in the Back body by a screw…
-
Part name Drain pan assembly Procedures Remarks Screw 7) Remove 7 screws and remove the Drain pan assembly. Drain Pan Screw 4 Electrical parts assembly <How to remove the Electrical parts assembly> Refrigeration 1) Remove the Air inlet grille, the Front panel TC sensor assembly and the Drain pan…
-
Part name
5 Refrigeration assembly Procedures Remarks 7) Remove 2 screws and remove the refrigeration assembly with pushing it to right hand. 2 Screws 6 Multiblade fan and Fan motor <How to remove the Multiblade fan and Fan motor> 1) Remove the Air inlet grille and the Front panel. (1, 2) 2) Disconnect 2…
-
11. EXPLODED VIEWS AND PARTS LIST
-
11-2. Indoor Unit
-
TOSHIBA CARRIER (THAILAND) CO., LTD
144/9 MOO 5, BANGKADI INDUSTRIAL PARK, TIVANON ROAD, TAMBOL BANGKADI, AMPHUR MUANG, PATHUMTHANI 12000, THAILAND. – 86 –
Схемы, таблицы и рисунки — в просмотре документа выше. Клик по номеру страницы открывает её в просмотре.
Новое в каталогах
-

Каталог продукции Веза 2026 - Оборудование для противодымной вентиляции. pdf, 7.85 Mb
Каталог оборудования Веза для противодымной вентиляции: вентиляторы дымоудаления и подпора, противопожарные клапаны, люки и прочее оборудование — назначение, технические характеристики, габаритные размеры. -
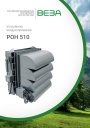
Каталог продукции Веза - Воздухоприемное устройство РОН 510. pdf, 1.96 Mb
Каталог воздухоприёмных устройств РОН 510: назначение, конструкция, технические характеристики, габаритные размеры, обозначение при заказе. -
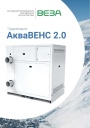
Каталог продукции Веза 2026 - Гидромодули АкваВЕНС 2.0. pdf, 1.29 Mb
Каталог гидромодулей АкваВЕНС 2.0: назначение, конструкция и исполнения, гидравлические схемы, технические характеристики, габаритные размеры, обозначение при заказе.
Новое в инструкциях
-
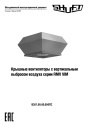
Крышные вентиляторы Shuft серии RMV VIM. pdf, 4.41 Mb
Модели: RMVE 190/300-2 … 450/670-4, RMVD 311/440-4 … 630/950-4 VIM. Паспорт (объединённый эксплуатационный документ): описание, массогабаритные показатели, монтаж, схемы электрических соединений, пуск, обслуживание, гарантийные обязательства, технические данные. -
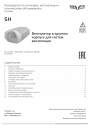
Вентиляторы в круглом корпусе Shuft серии SH. pdf, 646.47 Kb
Модели: SH 160, 200, 250, 315, 400. Руководство по установке, эксплуатации и техническому обслуживанию: технические характеристики, размеры, монтаж, электрические подключения, ввод в эксплуатацию, обслуживание и чистка, устранение неисправностей. -
Приточно-вытяжные установки Shuft серии NOVA. pdf, 4.29 Mb
Модель NOVA-300. Инструкция по монтажу и обслуживанию: принципиальная схема установки, массогабаритные показатели, монтаж воздуховодов и дренажа, подключение электропитания, схема электрических соединений, пусконаладка, обслуживание, неисправности, подключение к системе диспетчеризации.