

Инструкции на Сплит - системы Midea серии Mission
Настенные сплит-системы Midea серии MSMBA-07HRN1(W)/ MOAB01-07HN1,MSMBA-09HRN1(W)/ MOAB01-09HN1, MSMBB-12HRN1(W)/ MOBA02-12HN1, MSMBC-19HRN1(W)/ MOBA02-18HN1, MSMBD-24HRN1(W)/ MOCA01-24HN1,MSMBAU-09HRFN1(BW)/ MOBA02-09HFN1, MSMBBU-12HRFN1(BW)/ MOB03-12HFN1, MSMBCU-18HRFN1(BW)/ MOB02-18HFN1, MSMBDU-24HRFN1(BW)/ MOCA01-24HFN1. Инструкция по техническому обслуживанию.
Загружаем документ…
Текст инструкции
-
DM16-01.01.21en Mission ON-OFF SERIES Service Manual 2016 MSMBA-07HRN1(W) / MOAB01-07HN1 MSMBA-09HRN1(W) / MOAB01-09HN1 MSMBB-12HRN1(W) / MOBA02-12HN1 MSMBC-19HRN1(W) / MOBA02-18HN1 MSMBD-24HRN1(W) / MOCA01-24HN1 Service manual
-
1. Precaution
1.1 Safety Precaution To prevent injury to the user or other people and property damage, the following instructions must be followed. Incorrect operation due to ignoring instruction will cause harm or damage. Before service the unit, be sure to read this service manual at first. 1.2 Warning …
-
There is risk of fire or electric shock
Do not touch (operation) the product with wet hands. Do not place a heater or other appliance near the power cable. There is risk of fire and electric shock. Do not allow water to run into electrical parts. It may cause fire, failure of the product, or electric shock. Do not store or use…
-
Do not install the product where it will be exposed to sea wind (salt spray) directly. It may cause corrosion on the product. Corrosion, particularly on the condenser and evaporator fins, could cause product malfunction or inefficient operation. Operational Do not expose the skin directly to…
-
2. Function
Model Names of Indoor/Outdoor Units On-Off 6 Capacity Indoor units Outdoor units 7k MSMBA-07HRN1(W) MOAB01-07HN1 9k MSMBA-09HRN1(W) MOAB01-09HN1 12k MSMBB-12HRN1(W) MOBA02-12HN1 19k MSMBC-19HRN1(W) MOBA02-18HN1 24k MSMBD-24HRN1(W) MOCA01-24HN1 Service manual
-
3. Specification
-
Indoor model name
-
Input
-
4. Dimension
4.1 Indoor Unit Model W D H MSMBA-07HRN1(W) MSMBA-09HRN1(W) MSMBB-12HRN1(W) MSMBC-19HRN1(W) MSMBD-24HRN1(W) 1090 235 338 Service manual 11
-
For MSMBA-07HRN1(W), MSMBA-09HRN1(W),
12 Service manual
-
For MSMBB-12HRN1(W),
For MSMBC-19HRN1(W), Service manual 13
-
For MSMBD-24HRN1(W),
14 Service manual
-
4.2 Outdoor Unit
-
For MOAB01-07HN1, MOAB01-09HN1,
16 Service manual
-
For MOBA02-12HN1, MOBA02-18HN1,
-
For MOCA01-24HN1,
18 Service manual
-
5. Capacity tables
-
MSMBA-09HRN1(W) / MOAB01-09HN1
-
MSMBB-12HRN1(W) / MOBA02-12HN1
-
MSMBC-19HRN1(W) / MOBA02-18HN1
-
MSMBD-24HRN1 / MOMBD-24HRN1
-
6. Refrigerant Cycle Diagram
INDOOR OUTDOOR CHECK VALVE (Heating Model only) LIQUID SIDE 2-WAY VALVE CAPILIARY TUBE HEAT EXCHANGE (EVAPORATOR) HEAT EXCHANGE (CONDENSER) T1 Room temp. sensor T2 Evaporator temp. sensor GAS SIDE 4-WAY VALVE 3-WAY VALVE ACCUMULATOR COOLING COMPRESSOR 24 HEATING Service manual
-
7. Installation Details
7.1 Wrench torque sheet for installation Outside diameter Torque Additional tightening torque mm inch N.cm N.cm Ф6.35 1/4 1500(153kgf.cm) 1600(163kgf.cm) Ф9.52 3/8 2500(255kgf.cm) 2600(265kgf.cm) Ф12.7 1/2 3500(357kgf.cm) 3600(367kgf.cm) Ф15.9 5/8 4500(459kgf.cm) 4700(479kgf.cm) Ф19 3/4…
-
7.3 Pipe length and the elevation
The pipe length and refrigerant amount: Pipe size Model Gas MSMBA-07HRN1(W) / MOAB01-07HN1 MSMBA-09HRN1(W) / MOAB01-09HN1 MSMBB-12HRN1(W) / MOBA02-12HN1 MSMBC-19HRN1(W) / MOBA02-18HN1 MSMBD-24HRN1(W) / MOCA01-24HN1 Liquid 3/8’’ 1/4’’ (Ф9.52) (Ф6.35) 3/8’’ 1/4’’ (Ф9.52) (Ф6.35) 1/2’’ 1/4’’ (Ф12.7)…
-
7.4 Installation for the first time
Air and moisture in the refrigerant system have undesirable effects as below: Pressure in the system rises. Operating current rises. Cooling or heating efficiency drops. Moisture in the refrigerant circuit may freeze and block capillary tubing. Water may lead to corrosion of parts in the refrigerant…
-
2. Air purging by refrigerant
Procedure: 1). Confirm that both the 2-way and 3-way valves are set to the closed position. 2). Connect the charge set and a charging cylinder to the service port of the 3-way valve. 3). Air purging. Open the valves on the charging cylinder and the charge set. Purge the air by loosening the flare…
-
Open the valve at the bottom of the cylinder and press the check valve on the charge set to purge the air (be careful of the liquid refrigerant). 3) Put the charging cylinder onto the electronic scale and record the weight. 4) Operate the air conditioner at the cooling mode. 5) Open the valves (Low…
-
7.6 Re-installation while the indoor unit need to be repaired
1. Collecting the refrigerant into the outdoor unit Procedure 1). Confirm that both the 2-way and 3-way valves are set to the opened position Remove the valve stem caps and confirm that the valve stems are in the opened position. Be sure to use a hexagonal wrench to operate the valve stems. 2).…
-
the 2-way valve approximately 45’ for 3 seconds then closing it for 1 minute; repeat 3 times
After purging the air, use a torque wrench to tighten the flare nut on the 2-way valve. 4). Check the gas leakage Check the flare connections for gas leakage. 5). Discharge the refrigerant. Close the valve on the charging cylinder and discharge the refrigerant by loosening the flare nut on the 2-way…
-
Procedure
1). Connect the charge hose to the charging cylinder, open the 2-way valve and the 3-way valve Connect the charge hose which you disconnected from the vacuum pump to the valve at the bottom of the cylinder. If the refrigerant is R410A, make the cylinder bottom up to ensure liquid charge. 2). Purge…
-
8. Operation Characteristics
Mode Cooling operation Heating operation Drying operation Temperature Room temperature 17℃~32℃ 0℃~30℃ 10℃~32℃ Outdoor temperature 18℃~43℃ -7℃~24℃ 11℃~43℃ CAUTION: 1. If the air conditioner is used beyond the above conditions, certain safety protection features may come into operation and cause the…
-
9. Electronic function
9.1 Abbreviation T1: Indoor room temperature T2: Coil temperature of evaporator T3: Coil temperature of condenser T4: Outdoor ambient temperature T5: Compressor discharge temperature 9.2 Display function 7.2.1 Icon explanation on indoor display board. Digital display: Displays the temperature…
-
Dispalys ‘
’ during self clean operation (if aplicable). Dispalys ‘ ’ under 8℃ heating operation. Mission On-off WIFI control display (WiFi kit is in standard) Displays when the WIFI control feature is activated. NOTE: A guide on using the infrared remote is not included in this literature package.. Service…
-
9.3 Main Protection
7.3.1 Time Delay at restart for compressor. Less than 1 minute delay for the 1st time start-up and 3 minutes delay for others. 9.3.2 Sensor protection at open circuit and breaking disconnection. 9.3.3 Zero crossing detection error protection If AC cannot detect zero crossing signal for 4 minutes or…
-
9.4 Operation Modes and Functions
9.4.1 Fan mode (1) Outdoor fan and compressor stop. (2) Temperature setting function is disabled, and no setting temperature is displayed. (3) Indoor fan can be set to high/med/low/auto. (4) The louver operates the same as in cooling mode. (5) Auto fan: High Medium Low 9.4.2 Cooling Mode 9.4.2.1…
-
9.4.2.3 Indoor fan running rules
In cooling mode, indoor fan runs all the time and the speed can be selected as high, medium, low and auto. The auto fan: T1-Ts High Medium Low 9.4.2.4 Low evaporator coil temperature T2 protection T2 On Off When the evaporator coil temp.T2 keeps lower than setting value, the compressor and outdoor…
-
9.4.2.5 High condenser temperature T3 protection (only for MSMBD-24HRN1-QB8W)
T3 Compressor Off Compressor On When high condenser temp. T3 is more than setting value, the compressor will stop. During the protection, the outdoor fan keeps working. 9.4.3 Heating Mode 9.4.3.1 Compressor running rules: When indoor room temp.T1 is higher than setting value the compressor and…
-
Auto fan action
T1-TS Low Medium The indoor fan speed will adjust according to the value of T1-TS. 9.4.3.4 Defrosting mode: For MSMBA-07HRN1(W), MSMBA-09HRN1(W), MSMBB-12HRN1(W), MSMBC-19HRN1(W) models: AC will enter the defrosting mode according to the value of temp difference between T2 and T1, and also the…
-
9.4.4 Auto-mode
This mode can be chosen with remote controller. In auto mode, the machine will choose operation mode according to ∆T (∆T =T1-Ts). T1-Ts Cooling Fan only Heating* Heating*: For cooling only models, they will run at fan speed AC will run in auto mode in the below cases: (1) Pressing the forced auto…
-
9.4.8 Refrigerant Leakage Detection
With this new technology, the display area will show “EC” when the outdoor unit detects refrigerant leakage. When compressor is active, the value of the Coil temperature of evaporator T2 has no change or very little change. 9.4.9 8℃ Heating When the compressor is running, the indoor fan motor will…
-
10. Troubleshooting
10.1 Indoor Unit Error Display Operation lamp Timer lamp Display ☆ 1 time X E1 EEPROM parameter error ☆ 2 times X E2 Zero-crossing signal detection error ☆ 3 times X E3 Indoor fan speed has been out of control ☆ 5 times X E5 Indoor room temperature sensor T1 open circuit or short circuit ☆ 6 times X…
-
10.2 Diagnosis and Solution
10.2.1 EEPROM parameter error diagnosis and solution(E1) Error Code E1 Malfunction decision Indoor or outdoor PCB main chip does not receive feedback conditions from EEPROM chip. Supposed causes ● Installation mistake ● PCB faulty Trouble shooting: EEPROM: a read-only memory whose contents can be…
-
10.2.2 Zero crossing detection error diagnosis and solution(E2)
Error Code E2 Malfunction decision When PCB does not receive zero crossing signal feedback for 4 conditions minutes or the zero crossing signal time interval is abnormal. Supposed causes ● Connection mistake ● PCB faulty Trouble shooting: Service manual 45
-
10.2.3 Fan speed has been out of control diagnosis and solution(E3)
Error Code E3 Malfunction decision When indoor fan speed keeps too low (300RPM) for certain time, conditions the unit will stop and the LED will display the failure. Supposed causes ● Wiring mistake ● Fan ass’y faulty ● Fan motor faulty ● PCB faulty Trouble shooting: 46 Service manual
-
Index1
1: Indoor AC Fan Motor Power on and set the unit running in fan mode at high fan speed. After running for 15 seconds, measure the voltage of pin1 and pin2. If the value of the voltage is less than 100V(208~240V power supply)or 50V(115V power supply), the PCB must has problems and need to be…
-
10.2.4 Open circuit or short circuit of temperature sensor diagnosis and solution(E5)
Error Code E5/E6/ E7 Malfunction decision If the sampling voltage is lower than 0.06V or higher than 4.94V, conditions the LED will display the failure. Supposed causes ● Wiring mistake ● Sensor faulty Trouble shooting: Check the connection between temperature sensor and PCB. No Correct the…
-
10.2.5 Refrigerant Leakage Detection diagnosis and solution(EC)
Error Code EC Malfunction decision Define the evaporator coil temp.T2 of the compressor just starts conditions running as Tcool. In the beginning 5 minutes after the compressor starts up, if T2 <Tcool-2℃ does not keep continuous 4 seconds and this situation happens 3 times, the display area will…
-
10.2.6 Indoor / outdoor unit’s communication diagnosis and solution(E9)
Error Code E9 Malfunction decision Indoor unit does not receive the feedback from outdoor unit during conditions 120 seconds. Supposed causes ● Wiring mistake ● Indoor or outdoor PCB faulty Trouble shooting: 50 Service manual
-
Main parts check
1.Temperature sensor checking Disconnect the temperature sensor from PCB, measure the resistance value with a tester. Temperature Sensors. Room temp.(T1) sensor, Indoor coil temp.(T2) sensor, Outdoor coil temp.(T3) sensor, Outdoor ambient temp.(T4) sensor, Compressor discharge temp.(T5) sensor.…
-
Appendix 2 Temperature Sensor Resistance Value Table for T5 (°C --K)
Схемы, таблицы и рисунки — в просмотре документа выше. Клик по номеру страницы открывает её в просмотре.
Другие файлы документа
- Настенные сплит-системы Midea серии MSMBA-07HRN1(W)/ MOAB01-07HN1,MSMBA-09HRN1(W)/ MOAB01-09HN1, MSMBB-12HRN1(W)/ MOBA02-12HN1, MSMBC-19HRN1(W)/ MOB…PDF · 1.56 Mb
- Настенные сплит-системы Midea серии MSMBA-07HRN1(W)/ MOAB01-07HN1,MSMBA-09HRN1(W)/ MOAB01-09HN1, MSMBB-12HRN1(W)/ MOBA02-12HN1, MSMBC-19HRN1(W)/ MOB…PDF · 3.23 Mb
- Настенные сплит-системы Midea серии MSMBA-07HRN1(W)/ MOAB01-07HN1,MSMBA-09HRN1(W)/ MOAB01-09HN1, MSMBB-12HRN1(W)/ MOBA02-12HN1, MSMBC-19HRN1(W)/ MOB…PDF · 3.80 Mb
- Настенные сплит-системы Midea серии MSMBA-07HRN1(W)/ MOAB01-07HN1,MSMBA-09HRN1(W)/ MOAB01-09HN1, MSMBB-12HRN1(W)/ MOBA02-12HN1, MSMBC-19HRN1(W)/ MOB…PDF · 1.74 Mb
Новое в каталогах
-
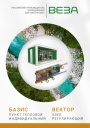
Каталог продукции Веза 2025 - Пункт тепловой индивидуальный БАЗИС, узел регулирующий ВЕКТОР. pdf, 8.85 Mb
Каталог индивидуальных тепловых пунктов БАЗИС, узлов регулирующих ВЕКТОР и блочных тепловых пунктов: назначение, схемы, комплектация, технические характеристики, габаритные размеры. -
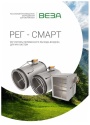
Каталог продукции Веза 2024 - Регуляторы переменного расхода воздуха РЕГ-СМАРТ для VAV-систем. pdf, 1.83 Mb
Каталог регуляторов переменного расхода воздуха РЕГ-СМАРТ для VAV-систем: назначение, конструкция, исполнения, технические характеристики, габаритные размеры, обозначение при заказе. -
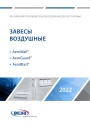
Каталог продукции Веза 2025 - Воздушные завесы. pdf, 4.97 Mb
Каталог воздушных завес Веза AeroWall, AeroGuard, AeroBlast: назначение, конструкция и исполнения, технические характеристики, габаритные размеры, подбор.
Новое в инструкциях
-
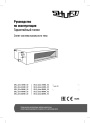
Полупромышленные канальные сплит-системы Shuft серии SFLC_D. pdf, 10.37 Mb
Модели: SFLC_D/in-18…60HN1_V2, SFLC_D/out-18…60HN1_V2. Руководство по эксплуатации: устройство, проводной пульт, монтаж, электрические схемы подключения, размеры, технические характеристики, устранение неисправностей, протоколы приёмки и тестового запуска, гарантийный талон. -
Полупромышленные напольно-потолочные сплит-системы Shuft серии SFLC_CF. pdf, 8.93 Mb
Модели: SFLC_CF/in-18…60HN1_V2, SFLC_CF/out-18…60HN1_V2. Руководство по эксплуатации: устройство, проводной пульт, монтаж, электрические схемы подключения, размеры, технические характеристики, устранение неисправностей, протоколы приёмки и тестового запуска, гарантийный талон. -
Мульти-сплит-системы Shuft серии FMI. pdf, 4.82 Mb
Модели: внутренние блоки SFMS/I-07…18 HB FMI/N8/IN/WHITE, наружные SFMO/I-14…42 FMI-2…5/N8/OUT. Руководство по эксплуатации: технические характеристики, управление кондиционером, монтаж, техническое обслуживание, поиск и устранение неисправностей, возможная комплектация блоков, гарантийный талон.