

Инструкция на Системы управления V-Net PQCSS520A0E
Инструкция по монтажу. LG. Системы управления V-Net PQCSS520A0E
Загружаем документ…
Текст инструкции
-
Installation/Owner's Manual
Advanced Central Control Manager (PQCSS520A0E) ITALIANO AC Manager ENGLISH LG ESPAÑOL FRANÇAIS DEUTSCH Caution CHINESE • Before installation, be sure to read this manual. • This device should be installed by a qualified technician. • Even after reading this manual, be sure to keep it for reference…
-
4. NOTE
4-1 TCP/IP setting guide 4-1 4 AC Manager
-
1. AC Manager Overview
ENGLISH AC Manager function AC Manager overall system diagram What are included in AC Manager AC Manager hardware specification AC Manager stands for Advanced Central Control Manager, which is a PC control controller for monitoring and controlling of air conditioner and ventilation in each room of…
-
AC Manager Function
Individual/Integrated Operation Monitoring AC Manager can check the operation status, operation mode, wind strength, wind direction, lock, setting temperature, error and etc. of the air conditioner by selecting it individually, by group or entirely. The manager of the building with lots of air…
-
Schedule auto operation maintenance / Saving energy
Remote control through the Internet When using ACP as a server, using the Internet enables the control over all air conditioners through connection to ACP. If you control the air conditioner using web browser, you can use only basic control and monitoring function, not all functions of AC Manager.…
-
AC Manager Overall System Diagram
-
What are included in AC Manager
Following items are included in AC Manager package. After opening the AC manager box, please check if all the items are included. ENGLISH LG AC Manager installation CD USB Hard Lock key Installation/Owner’s manual AC Manager Installation/User’s manual 1-7
-
AC Manager hardware specification
AC Manager requires a special PC for AC Manager that user purchased. AC Manager is a Windows program, and requires 50 Mbytes in its installation. The recommended system specification for AC Manager installation is as follows; Item Description CPU Over Pentium_ 2.2GHz Main memory OS Over 256MB…
-
Please install the program in the order below, in order to use AC Manager
ENGLISH Step 1 : Hardware Installation Step 2 : Hard Lock Key driver installation Step 3 : AC Manager software installation Step 4 : Log-on to AC Manager AC Manager Installation/User’s manual 2-1
-
Hardware Installation
AC Manager is connected one ACP This is the case that AC Manager is installed in separate PC and PC is directly connected to ACP. In this case, the Ethernet cable should be connected through the cross cable. Using Ethernet cable(cross cable), Connect Ethernet 1 port of APC to PC. In this case, you…
-
Enlarged figure of ACP Ethernet terminal is as shown below
-
AC Manager Software installation
USB Hard Lock key driver installation ENGLISH Note: Lock key When installing AC Manager program, the lock key shouldn’t be connected to the computer. 1. Insert the AC Manager installation CD into CD-ROM. AC Manager installation program is automatically executed. If the program isn’t automatically…
-
2. Driver installation screen appears
Please read caution when installing driver and press OK button. 3. Select language window appears. Select U.S English and click OK button. 4. Welcome message window appears. Press Next button 2-6 AC Manager
-
5. Accept the license agreement window appears
ENGLISH Check Accept the license agreement box and click install button. Now installation begins. Driver installation can take from a few minutes to tens of minutes. If below window appears, the driver installation is completed. Click Finish button, and then AC Manager program installation is…
-
AC Manager Program Installation
1. Insert AC Manager installation CD into CD-ROM. AC Manager program is automatically executed. If the program isn’t automatically executed, execute Autorun.exe file in CD. Below initial screen appears. The order of menu as shown in this figure, user will install lock key driver and then AC Manager…
-
4. Shortly after the installation program is
Press Next button. 5. The program is installed in “C: \ Program Files \ LG Electronics”. This screen indicating the installation is completed appears. Click Complete button. Now AC Manager program installation is completed. AC Manager Installation/User’s manual 2-9 ENGLISH executed, the initial…
-
Connecting Lock key to AC Manager
Insert Hard Lock key into USB port of AC Manager PC. All functions of AC Manager will be determined by the authentication key. While using AC Manager, this key should be kept inserted in PC. 2-10 AC Manager
-
1. Execute AC Manager engine program. Or, you can double-click ACMSvcManager direct link icon as shown on the right. Click Install button in above screen and click Start button. As shown below, it will change to “Service status: Running”. If it changes to “Service status: Running”, this means the…
-
Note : ID
The manager ID of AC Manager is as follows; ID : admin , Password : digital21 Use this when you first log in and after log-in, we recommend another ID and password. 3. Log in After entering ID and password in log-in window, click the button. For administration, enter ID and password. (ID : admin…
-
Warning
Note : Lock key When using AC Manager, keep Hard Lock key inserted in the USB port of AC Manager PC. All functions of AC Manager will be determined by the authentication key. AC Manager Installation/User’s manual 2-13 ENGLISH The authentication key cannot be found! If this isn’t solved within 30…
-
AC Manager program deletion
For reference, let’s find out how to delete AC Manager program. This description is based on Window XP. 1. Click [Start] → [Control board] → [Add/delete program]. Find imsManager program in this window and click modify/delete button. 2. The window that you can delete program appears. After checking…
-
4. The window indicating the program
ENGLISH deletion is completed appears. Click Complete. Caution: Restart the computer After removing AC Manager program, you should restart the computer immediately. AC Manager Installation/User’s manual 2-15
-
If AC Manager program is installed, following menu and functions are available
• What is in menu • Preset • Default control • Peak control • Schedule • History management • Accumulated power • Pleasant control • Device connected control • Monitor Let’s find out screen descriptions and how to use each function. 3-1 AC Manager
-
Below is the entire menu construction of AC Manager. ENGLISH Home Main screen Decide display content from the top menu Basic control Air conditioner control Ventilator control Peak control Desired power consumption display and control Current power consumption display Set/Cancel peak operation…
-
Preset
Let’s find out more details on most basic menu and button functions of the main screen of AC Manager. Before using AC Manager, we will find out preset items. The description will be based on the screen of which menu is set in English. AC Manager Main Screen Basic menu In file menu, below sub menu is…
-
Exit : You can exit this menu
- Menu - Program information Shows current version and program information in AC Manager information. - Language The language to be used in AC Manager can be set in English, Korean, Spanish, Chinese, French, Italian and German. 2 Menu selection button Select the menu to carry out tasks like default…
-
AC Manager Preset Items
If you select the system setting in menu selection, the information setting window as shown in below figure appears. You can use AC Manager only when you preset the name of indoor unit, using functions, user register and control group, schedule group. Caution :ID If you log in not with manager ID…
-
(4) Peak exception setting
Sets the indoor unit for peak operation exception. ENGLISH (5) User information setting Registers the manager and menu construction and on-line service. Specific description on each menu is as follows; 1 System Installation Click system installation button and you can see the below window. AC…
-
Note: Calling for installation professionals
- Since entering ACP information and the outdoor unit information is basic information for system operation, wrong amendment may cause trouble in using AC manager. If amendment is necessary, please call for installation professionals. - The address other than the indoor unit name in entering the…
-
3. If there are many ACP’s, click (3) basic entering button and then, 16 ACP’s are set all at the same time. ENGLISH Except the installed Quantity of ACP’s, when you delete rest of them, use (4) delete button. Below is description on the outdoor unit information description. In this part, the…
-
2. Click (2) basic entering button, and then the information on up to 16 outdoor units that can be set as below is set at the same time. Click (3) edit button. 3. Select (3) Edit, and then you can edit basic information in below window. In this window, you can edit the name, model and etc. of the…
-
Below is description on setting the information on the indoor unit
ENGLISH 1. Click (1) Add and then one indoor unit information is added to under the outdoor unit at a time. You can add the list by clicking as many as the number of the indoor unit. 2. After selecting the outdoor unit, click (2) Input default button, and then the entire indoor unit information that…
-
After setting, click OK to exit this window. The outdoor unit that isn’t installed can be deleted using (4) Delete button in the default screen. 4. Click Edit port use button and then below window appears. You can check and edit port information in this screen. 3-11 AC Manager
-
5. Click Edit button and below window will appear
ENGLISH Set port name, connection device, drawing information, connected port, use and etc. and then, click OK button to save the contents. AC Manager Installation/User’s manual 3-12
-
Edit control group After system setting, the group should be edited. There are 2 types of groups, the control group with main functions of control and monitoring and the schedule group operating according to the same schedule as that of the control group. All indoor unit can normally operate only…
-
1. Select the desired indoor unit of the indoor unit information in (3) and click << button and then, this indoor unit moves to (4). Now this indoor unit will be contained in the selected group. 3. Click (5) Indoor unit name, address and control group button and you can sort the indoor unit for each…
-
Edit schedule group
A group setting function to carry out schedule function. After system setting, the schedule group should be edited. The schedule group can be set in the same way as the control group. Let’s look over how to add the schedule group. 1. Using (1) Add group button to add the group. Click Add group…
-
Note: Information Print-out button
- You can print out the information in Excel or by printer using Information print-out button. - While pressing Shift key, select one indoor unit, and the entire devices from previous 4 Peak exception setting Note: Peak Details on Peak will be explained in the description on each menu after the…
-
User I information setting You can set the information on the user of AC Manager. 1. Click Register manager button in user information setting, and then below window appears. 2. Click Menu button and below window appears. 3-17 AC Manager
-
3. If you click on-line service register button, below window will appear
If you want to register to web site as an AC Manager user, enter service server and field information. After entering what you want, click OK button. Click Cancel button to exit current window. AC Manager Installation/User’s manual 3-18 ENGLISH Select Menu button to be shown in the main menu of AC…
-
Basic Control
Basic control means functions like selection of group and air conditioner by AC Manager, operation mode, wind strength, wind direction, all lock, individual lock(temperature lock, mode lock, wind lock), desired temperature setting, operation and stop and etc. Click basic control button and below…
-
Indoor unit operation status indication and selection window
ENGLISH Let’s find out the description on each part indicated on above menu. 1 Operation status lamp Lamp color Description Operation status indication Error indication Stop indication Indication that the control details are being transmitted AC Manager Installation/User’s manual 3-20
-
Operation mode lamp The mode being operated is indicated as an icon. <Air conditioner> Operation mode Description Cooling operation indication Cooling operation stop indication Moist-removing operation indication Moist-removing operation stop indication Wind operation indication Wind operation stop…
-
All lock
Lock Description Activate All lock Deactivate all lock 4 Kind of unit Icon Description Activate All lock Deactivate all lock 5 Wind strength Icon Description Weak wind strength Weak medium wind strength Strong wind strength Auto wind 6 Desired temperature Indicates desired temperature for each air…
-
Control button
The control button includes air conditioner control button and ventilation control button. Operation/stop button is used for both air conditioner and ventilation. Air conditioner operation mode Button 3-23 Description Cool The desired temperature can be selected between 18°C and 30°C. Excessive…
-
Wind strength
A function adjusting the wind strength to weak, medium, strong and auto. ENGLISH Wind direction The wind direction of air conditioner can be set. Lock There are All lock, temperature lock, Mode lock and Wind strength lock. temperature lock is for locking temperature setting function, Mode lock is…
-
Icon
Description Measures indoor and outdoor temperature and automatically adjusts supplied and discharged air and optimally operates to keep the balance of indoor air. ❈ When connected to Multi V, other than indoor/outdoor temperature, this find optimum condition by the operation speed and setting…
-
Select all
Deactivate all Deactivates all the air conditioners/ventilation products currently selected. This works in the same way as Select all button. Group selection window Group name Description Control group Logically identifies the group. For example, this identifies, such as lobby on the 1st floor and…
-
Peak control
Peak control is a function managing the maximum consumed power. Peak control can use peak operation rate control or demand control function depending on the specification of installed field. Main functions of peak control are as follows; - Managing all the installed air conditioners (Central control…
-
ENGLISH
(1) Current operation status & power control setting (2) Power using amount monitor (3) Power control setting From now on, we will find out the using method for each part. 1 Current operation status & power control setting Current power indicates what percentage the operation rate of current air…
-
This indicates the cycle of the forced operation stop. For
example, if it is set to 5 minutes, you should change the air conditioner that is forced to stop every 5 minutes so that the stop time of every air conditioner is the same. The operation switch cycle can be adjusted within 5~15 minutes. The facility manager checks concurrently power value when all…
-
Power control setting
Below is description on each item of above menu. Button Description Desired power Can be set by 0.1 kW. Power rate Can be set between 0% and 100% of maximum available power and adjusted by 1%. Switch time Meaning a cycle that stops the forced operation. Can be set between 5 and 15 minutes and can be…
-
Setting peak not applied
1. The air conditioner not to be affected by peak operation rate control can be registered. Click peak not applied button and this window appears. After selecting the indoor unit you want, click >> button. 2. The selected indoor unit moves to right panel as shown in this screen. If you want to set…
-
Depending on the setting of peak-not-applied air conditioner, the desired power and the setting value of the desired operation rate may change. The more the number of peak-not-applied air conditioner, the more the number of the air conditioner operated by user’s individual control may become. Due to…
-
Schedule
Schedule is a function that the operation of air conditioner is preset so that the air conditioner can carry out the preset operation at certain time. Schedule function means that if the air conditioner should be controlled according to certain schedule, user doesn’t have to set the operation status…
-
(3) Schedule function
Note: As for schedule function, we explain on the menu first and then, scenario. Let’s find out each button on the schedule function screen and the screen for display. User can follow the scenario and practice functions like Using weekly schedule function, Using special schedule function, Using…
-
Description on Edit weekly schedule screen
Let’s find out about each menu on above screen. 1 Schedule group selection window The schedule function can be set in such way that the same or unique operation can be made for each schedule group. For currently set group, the group name and group number appear in the list. Among them, you can…
-
The figure on the right is an image that appears in case of heating,
deactivating lock and 30_ setting. 1 Schedule list This can be used when you want to create/delete or select new weekly schedule. 2 Delete, copy and paste You can use Delete button when you want to delete the currently displayed schedule. If you want to set the schedule in the way of making schedule…
-
Operation lock schedule A function that limits(Lock setting) the operation/stop function of the wire remote controller according to weekly schedule(day setting/hour setting) and controls operation on/off at certain time(operation setting). Button Description Day setting Sets the day weekly(Monday ~…
-
Description on weekly schedule setting screen
In this screen, you can check weekly schedule status set within recent 2 months basically. You can set/deactivate the desired schedule in certain week from all weekly schedules currently saved. ENGLISH Let’s find out about above menu. 1 Schedule calendar The initial screen is the calendar of current…
-
Set/Cancel setting schedule button This can be used when you want to set the weekly schedule on the desired week. Firstly, select the desired schedule from (2) Weekly schedule list and click with mouse and select the desired week from (3) Weekly setting schedule list and click << button and Save…
-
Description on Special schedule edit screen
4 2 ENGLISH Let's find out about the description on above screen menu. Caution: Delete Basically, editing and function is the same as that of weekly schedule edit. Please note that if you click Delete button, previously saved schedule information is deleted. AC Manager Installation/User’s manual…
-
Selecting schedule group and indoor unit
Schedule function can be set in such way that the same or unique operation can be made for each schedule group. The group name and group number appears in the list for currently setting groups. Among them, you can select the schedule group using mouse. If you want to edit(add/delete) the schedule…
-
- Edit schedule hour : Checked and selected as a default value. Drag mouse for select/delete
operation. In case of editing schedule hour, when clicking mouse, the area turns grey and becomes selected. If you want to change temperature, mode and etc. in the edited schedule of previous control setting, select Change mode, click the desired hour area in weekly schedule and then, click the…
-
Special schedule setting screen setting
Let’s find out about above screen menu. 1 Special schedule calendar At first, the calendar of current date appears as a default and clicking right/left button image on the top of the calendar enables you to move past or future desired date. Thereby, the daily schedule status set in (3) varies. 2…
-
Special schedule setting button You can use >> button when you want to cancel the schedule set on specific date. Select the date you want to cancel from the special setting schedule list with mouse and click >> button. You can see the setting schedule is cancelled. Until now, the menu of the…
-
Using weekly schedule function
Create schedule and designate the schedule group to operate Apply the pattern for the designated schedule to be operated Apply the period for the schedule group with the pattern to be operated We will introduce the virtual scenario that user takes this process. Follow this scenario and you can use…
-
Satisfying the schedule group to operate by creating the schedule
1. In AC Manager main screen, click system setting button ➔ Edit schedule group, and then following ENGLISH screen appears. 1. Using (1) Add group button, Add group. Click Add group button and the, the group name automatically appears in (5). 2. After selecting the group from the control group…
-
Applying the pattern for the schedule group to operate
1. Click Edit weekly schedule button in the schedule main screen and below window appears. Click the bordered schedule list button on the top. 2. The window that the schedule information can be added appears. Click Add button to input and save weekly schedule name. This name can be edited and…
-
3. The schedule name appears as below. For example, "Drama club" is set
ENGLISH Drag the hour on the desired date and then, set the desired mode, wind strength, wind direction, temperature, all lock and etc. in air conditioner. If you get the mouse off, the settings appear in the schedule window. 4. If you want to change the items in previously selected area, check…
-
5. Click Copy button, and below window appears
If you click Yes, current Week Schedule(0) is copied and may be applied to another area. 6. After selecting the group name that you want to paste this copied schedule from the schedule group and select Paste button, the schedule of the schedule[0] will be copied here. After setting, click Save and…
-
Applying the operation period of the schedule group to which the pattern was applied
1. Creates the schedule group and sets the air conditioner operation schedule to apply to this group Weekly schedule setting/setting schedule/Apply for a year/Saved schedule list/Drama club/Save/OK Click the desired group name from the saved schedule list. If you apply this for a year, click Apply…
-
2. Click << button, and the schedule name is reflected and shown as below
Now, click Save button. If you want to delete the schedule, select the schedule name and click >> button. 3. Click Save button and the confirmation message on the saving appears. Click Yes, and below confirmation message appears. Click OK. 3-51 AC Manager
-
4. Now, you can see the schedule is reflected as bordered part below in the schedule main screen
ENGLISH AC Manager Installation/User’s manual 3-52
-
Using special schedule function
User will use the special schedule function in the order as below. Create the schedule and specify the schedule group to operate Apply the pattern for the specified schedule to be operated Apply the schedule group with the pattern applied to operate We introduce the virtual scenario that user takes…
-
Create the schedule and specify the schedule group to operate
1. In AC Manager main screen, click system setting button Edit schedule group, and below screen appears. ENGLISH Using (1) Add group button, add group. Click Add group button and the group name automatically appears in (5). 2. Select the group from the control group and use (2) Edit group to change…
-
Applying the pattern for the specified group to be operated
1. In schedule main screen, click Edit special schedule button and below screen appears. Click the bordered schedule list button on the top. 2. The window that the schedule information can be added appears. 3-55 AC Manager
-
3. Schedule name appears as below. For example, "Holiday" is set
Drag time on the desired date and set the desired mode, wind strength, wind direction, temperature, all lock and etc. from air conditioner. Get the mouse off and them the setting appears in the schedule window. 4. If you want to change the information of the previously selected area, check "Change…
-
Note
When setting the schedule at first, select Edit schedule time and select Change mode when you only change mode in the previously selected area. If you want to change the mode of previous area with Edit schedule time checked, below window appears and you cannot edit. After setting, click Save button…
-
Applying the operation period of the schedule group with the pattern applied
1. Creates the special schedule group and sets the air conditioner operation schedule to apply this Click the group name from the saved schedule list. Click the date you want to set the schedule. Click the date and click << button. Click << button and the schedule list name is reflected to the…
-
Click Yes and below pop up appears
Click OK to exit this window. 3. Now you can see the schedule is reflected in the schedule main screen as below. Above screen is an example that "Holiday" has been added to the special schedule group and "Week Schedule Name 1" has been added to weekly schedule group. In this way, user can manage and…
-
Using the function to suspend entire schedule
Click Suspend entire schedule button and below window appears. ENGLISH As a default, this function is checked as Deactivate. If you check Activate, you can stop the air conditioner operation for certain period. This is a convenient function when controlling the air conditioner at a time. After…
-
Using the function to send the current schedule
1. Click Send current schedule button and below window appears. Click Yes button and currently set schedule is applied. 2. As in the box in the bottom of below main screen, it is indicated that the schedule is being sent and applied. Now, we have looked over managing and adjusting weekly schedule…
-
History management
In the history management menu, the control and error status of air (1) History data display (2) History period selection (3) History device selection (4) History data selection (5) Inquiry, update On above menu, let’s find out each item. AC Manager Installation/User’s manual 3-62 ENGLISH…
-
History data display
A window displaying history data. The history of the devices connected to air conditioner, ventilation and external input port can be displayed separately. By selecting AC, VENT and ETC on the left top of the display window, the device history is displayed. - AC : Data on air conditioner, indicating…
-
Selecting specific device
1. Click Select button and below Select history device window appears. ENGLISH Select the desired device on above screen and click OK button. The settings are determined and the window is closed. AC Manager Installation/User’s manual 3-64
-
2. Click Update button in main screen. Only the history data of the selected device is displayed as
below. 4 Select history data Shows all kinds of data on the air conditioner/ventilation/external input device of the system and these are divided into “Status information data” and “Error data”. If you want to check error history, don’t check the status information, but check the error information.…
-
Inquiry, update 1. Click using time inquiry button and below screen appears. 2. Click Print button on main screen and below window appears. If you want to print out, you can print out entire area or the selected area in many ways. Click OK button to print out the data. 3. Click Update button on main…
-
Accumulated power
Accumulated power is a function that indicates the used power for each indoor unit or maintains this efficiently when the outdoor unit is commonly used, such as studio apartment, condo and etc. Main functions are as follows; - Using ACP and AC Manager, distributing consumed power to each room…
-
Power information
2 Using Power Shows total using power currently being used. You can check total using power and using power for the group. 3 Period You can check the power amount based on current level and certain period. 4 Print You can print out the current details or save as file. AC Manager Installation/User’s…
-
Pleasant control
AC Manager can automatically control the indoor unit and ventilator connected through the network based on current temperature and setting temperature. Therefore, this can provide user with optimum and pleasant cooling function. In pleasant control menu, following 2 functions are provided as these…
-
Temperature limit operation
Temperature limit operation is a function that keeps the temperature of the place with the air conditioner installed within certain range(+4°C ~ -4°C). • If the indoor temperature increases higher than the setting temperature, the cooling function of the air conditioner is operated and decreases the…
-
In this chapter, using the pleasant control menu, we will explain how to operate AC Manager function
in the order. Below is the default screen of the pleasant control menu. The description on each menu on above screen is as follows. 1 Air conditioner list Shows the name of the operating indoor unit and whether the pleasant control function is set or not. 2 Comfort control group Can add, edit and…
-
Auto-change over operation, temperature limit operation Tab
Auto-change over operation tab is as follows; - Temperature difference : The temperature width that can change current temperature. Item Description Average The indoor unit being operated in the group operates auto-change over operation function at the average temp of the detected temperature.…
-
Device connected control
Emergency Stop Interlocking, the device connected control, is a function that stops all indoor units and ventilation units in case of fire and other emergency. The summary on this function is as follows. - Save current setting status function The indoor units and ventilation units being currently…
-
Pattern management
Let’s find out steps of managing the pattern for device connected control. Click pattern management button and below window appears. ENGLISH Below is the description on above menu. 1 Pattern name Creates and deletes the pattern. 2 Device list Selects the condition details of device. 3 Condition…
-
Let’s look over the order of example scenario
1. Click Create button and below window appears. Enter the pattern name and click OK button. Now, specific device that operates under this pattern or air conditioner’s condition and its action are set. 2. Specific operation of the indoor unit and device can be set as input conditions. Select a…
-
3. Now, set the operation status of air conditioner corresponding to the responsive print-out for the condition. Double-click the device reflected in (4) and below window appears. - Operation mode : Sets COOL, HEAT, FAN, AUTO and etc.. - Setting wind strength : Sets Fan speed. Sets LOW, HIGH, MID…
-
In this way, input the operation status of air conditioner corresponding to the input condition. In this window, the operation mode, wind direction, whether to lock or not, whether to stop operation or not and etc. can be set. This output can be made for the air conditioner, but depending on the…
-
Monitor
Let’s find out the scenario order using above menu. 1. Click “Brief” tab and above default screen appears. This shows the operation status of the indoor unit belonging to the current control group. Using below icon, for air conditioner, you can check cooling, heating, wind, removing humidity, On/Off…
-
<Air conditioner>
Operation mode Description Cooling Stop Cooling Removing humidity Stop Removing humidity Wind Stop wind Heating Stop Heating Auto operation Stop auto operation Error indication <Ventilation> Operation mode Description Electric heating Ventilation mode of supplied/emitted air through electric heating…
-
2. Click “Detail” tab, and the address of all air conditioners, operation mode, status, indoor
temperature, setting temperature, all lock and etc. are listed up as shown below. ENGLISH Above details reflect the air conditioner information being operated in the default control in real time. Let’s find out the menu on above screen. AC Manager Installation/User’s manual 3-80
-
Following information appears on the monitoring screen
<Air conditioner> Item Name of Air conditioner Description Shows currently registered air conditioner name. Operation mode Shows the operation mode of the air conditioner set. Operation status Shows the wind strength of the air conditioner set. Operation lock Shows whether to set the temperature…
-
Let’s find out below buttons
1 View all air conditioners ENGLISH View all information on air conditioners currently being operated. 2 View erroneous indoor unit Below window appears. Erroneous indoor unit appears. After checking the information, click OK button. You can save the erroneous information using Save as file button.…
-
4. Note
TCP/IP setting guide Below description is based on Window XP. 1. Click [Start] ➔ [Control board] on user’s PC, and below window appears. Click “Connect network” with border on above screen. 2. The window that local area connection can be set appears. Put the mouse on local area connection and…
-
3. The window of local area property appears
Double-click the Internet protocol (TCP/IP). ENGLISH Figure. Local area connection 2 property 4. IP setting window appears. Select Use next IP address and enter IP to add and click OK. When adding private IP, receive IP from the network administrator and enter this. AC Manager Installation/User’s…
-
5. You can additionally enter IP for AC Manager in IP of existing PC. Click Advanced button on above
screen, and you can add IP. Click Advanced button and below window appears. Enter additional IP here and while using existing IP, you can use AC Manager. After setting, click “OK” button. Note: LAN Line The additional IP in Advanced button will disappear when user remove LAN from PC. When LAN is…
-
P/No.: MFL37115806
Printed in Korea After reading this manual, keep it in a place easily accessible to the user for future reference.
Схемы, таблицы и рисунки — в просмотре документа выше. Клик по номеру страницы открывает её в просмотре.
Новое в каталогах
-
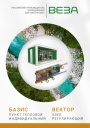
Каталог продукции Веза 2025 - Пункт тепловой индивидуальный БАЗИС, узел регулирующий ВЕКТОР. pdf, 8.85 Mb
Каталог индивидуальных тепловых пунктов БАЗИС, узлов регулирующих ВЕКТОР и блочных тепловых пунктов: назначение, схемы, комплектация, технические характеристики, габаритные размеры. -
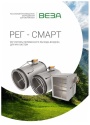
Каталог продукции Веза 2024 - Регуляторы переменного расхода воздуха РЕГ-СМАРТ для VAV-систем. pdf, 1.83 Mb
Каталог регуляторов переменного расхода воздуха РЕГ-СМАРТ для VAV-систем: назначение, конструкция, исполнения, технические характеристики, габаритные размеры, обозначение при заказе. -
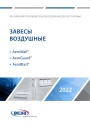
Каталог продукции Веза 2025 - Воздушные завесы. pdf, 4.97 Mb
Каталог воздушных завес Веза AeroWall, AeroGuard, AeroBlast: назначение, конструкция и исполнения, технические характеристики, габаритные размеры, подбор.
Новое в инструкциях
-
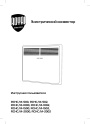
Электрические конвекторы Royal Thermo серии Capella RCHC/M. pdf, 5.01 Mb
Модели: RCHC/M-500, 502, 1000, 1002, 1500, 1502, 2000, 2002. Инструкция пользователя: устройство конвектора, управление прибором, уход и обслуживание, монтаж, хранение и транспортирование, технические характеристики, гарантийный талон. -
Электрические конвекторы Royal Thermo серии Capella RCHC/E. pdf, 5.01 Mb
Модели: RCHC/E-500, 502, 1000, 1002, 1500, 1502, 2000, 2002. Инструкция пользователя: устройство конвектора, управление прибором, уход и обслуживание, монтаж, хранение и транспортирование, технические характеристики, гарантийный талон. -

Бойлеры косвенного нагрева Royal Thermo. Правила установки. pdf, 251.55 Kb
Схема-памятка по установке бойлера косвенного нагрева: подключение к котлу и контурам ГВС/ХВС, группа безопасности, расширительный бак, диэлектрические муфты, фильтр очистки воды, заземление.