

Инструкция на Модули Buderus для систем управления CSM 7x0, CFB 8x0, CFB 9x0
Модули FM441/CMM 910, FM442/CMM 920, FM443/CMS 910, FM444/CMG 910, FM448/CMB 900, FM455/CMC 900, FM457/CMC 920, FM458/CMC 930 для систем управления Buderus CSM 7x0, CFB 8x0, CFB 9x0. Инструкция по монтажу (на английском языке).
Загружаем документ…
Текст инструкции
-
Mounting Instructions
-
1 Introduction . . . . . . . . . . . . . . . . . . . . . . . . . . . . . . . . . . . 3 1.1 1.2 2 Safety . . . . . . . . . . . . . . . . . . . . . . . . . . . . . . . . . . . . . . . 5 2.1 2.2 2.3 2.4 2.5 2.6 3 Possible module installations for control units CSM 7x0 . . . . 8 Arrangement of the…
-
Introduction | 3
1 Introduction These mounting instructions explain installation of the function modules CMx in the control unit series CSM 7x0, CFB 8x0 and CFB 9x0. USER INFORMATION Generally, these installation instructions can also be used for installing other modules, as the procedure is similar. 1.1 Definition…
-
4 | Introduction
1.2 Modules and their designation Designation Name Controller module CM431 Controller module Power supply module NM482 Power supply module ZM422 Burner control + 1 heating circuit + 1 DHW circuit ZM424 Boiler control + 2 heating circuits + 1 DHW circuit ZM432 Burner + boiler circuit functions ZM433…
-
Safety | 5
2 Safety 2.1 About these instructions This chapter contains general safety instructions which must be observed when installing the function modules CMx in the control units CSM 7x0, CFB 8x0 and CFB 9x. Also closely observe further safety instructions in other chapters of these installation…
-
6 | Safety
2.4 Explanation of the symbols used Two levels of danger are identified and signalled by the following terms: RISK OF FATAL INJURY Identifies possible risks associated with a product that might lead to serious injury or even death if appropriate care is not taken. WARNING! RISK OF INJURY / SYSTEM…
-
Safety | 7
Observe the following safety instructions during the installation of the function modules. RISK TO LIFE from electricity. z Ensure that all electrical work is only carried out by an authorised electrician. z Before opening the control unit: Isolate all poles of the power supply and secure against…
-
8 | Module assembly for control units CSM 7x0
3 Module assembly for control units CSM 7x0 This section describes the installation of the function modules CMx in the control units CSM 710 and CSM 750. USER INFORMATION z 3.1 Check that all parts have been delivered. If this is not the case, contact a Bosch Thermotechnology branch. Possible module…
-
Module assembly for control units CSM 7x0 | 9
3.2 Arrangement of the modules in the control unit (CSM 7x0) Fig 1 Slot assignment 1 Slot 1 2 Slot 2 3 Slot B behind the programming unit 4 Slot A for function module FM455/CMC 900 (only for CSM 750) ZM424 and FM455/CMC 900 (only for CSM 750) The module FM455/CMC 900 always occupies slot A (Æ Fig.…
-
10 | Module assembly for control units CSM 7x0
3.3 Fitting Fig 2 Removing covers RISK OF FATAL INJURY due to electrical current when the control unit is open. z WARNING! (2011/08) Before opening the control unit: Isolate all poles of the power supply and secure against unintentional reconnection. z Unscrew 2 screws on the upper housing cover (Æ…
-
Module assembly for control units CSM 7x0 | 11
Fig 3 Pivoting down device front z Press in upper nubs (Æ Fig. 3, [1] and [2]) on both sides. z Fold out forwards the device front with the Programmer (Æ Fig. 3, [3]). USER INFORMATION Ensure that the cable cover has been removed, otherwise you will not be able to pivot the device front forward.…
-
12 | Module assembly for control units CSM 7x0
Fig 4 Removing the cross brace You will need a screwdriver to remove the crossbar (Æ Fig. 4, [1]). (2011/08) z Undo the crossbar on one side. For this push one of the two clips (Æ Fig. 4, [3]) outwards with the screwdriver. z Lift the crossbar on one tab (Æ Fig. 4, [2]). z Push the second clip…
-
Module assembly for control units CSM 7x0 | 13
Fig 5 Removing blanking plate When fitting a new module z Remove blanking plate from slot 1 (Æ Fig. 5) in the control unit. z Connection cables for sensors and pumps must be laid and provided with terminals before installation of the module (more detailed information can be found in the technical…
-
14 | Module assembly for control units CSM 7x0
Fig 6 Inserting a module When removing and replacing a module (2011/08) z Disconnect leads for the respective module and fix in standby position (more detailed information can be found in the mounting instructions for control units CSM 7x0). z Pull module out of the control unit. z Push new module…
-
Module assembly for control units CSM 7x0 | 15
L N Netz Fig 7 Connect power supply to slot 1 Connecting module power supply to slot 1 z Plug in sensor leads and pump connections at the designated points on the module. z Plug 230 V module connector into the correct position in the terminal strip (Æ Fig. 7). Modules for control units CSM 7x0, CFB…
-
16 | Module assembly for control units CSM 7x0
Fig 8 Connecting power to slot 2 Connecting module power supply to slot (2011/08) z Remove dummy plug (Æ Fig. 8, [1]) of the three-pole plug (cable loom). z Plug in 230 V module connecting plug to the three-pole plug (Æ Fig. 8, [2]). Modules for control units CSM 7x0, CFB 8x0 and CFB 9x0
-
Module assembly for control units CSM 7x0 | 17
1 2 Fig 9 Positioning crossbar After module installation z Position crossbar (Æ Fig. 9, [1]) in the recesses and click into place. z Pivot the device front (Æ Fig. 9, [2]) back and click into place. Modules for control units CSM 7x0, CFB 8x0 and CFB 9x0 (2011/08)
-
18 | Module assembly for control units CSM 7x0
Fig (2011/08) Fitting casing cover and cable cover z Position top casing cover. z Replace both screws on the upper housing cover (Æ Fig. 10, [1] and [2]). z If additional cables were routed out of the device, the cable cover may need to be cut out in the lower section. z Position cable cover. z…
-
Module assembly for control units CSM 7x0 | 19
3.4 Removing and replacing the function module FM455/CMC 900 (only for CSM 750) Fig 11 Replacing the module FM455/ CMC 900 If it is necessary to replace the FM455/CMC 900 module, first remove the ZM424 module from slot 1. z Remove 230 V module connecting plug (Æ Fig. 7, page 15) and all the…
-
20 | Module assembly for control units CSM 7x0
Jumper switch The jumper switch is used to configure the module: Function Position open (factory setting) The module logs on as a new module FM455/CMC 900 or FM457/CMC 920. USER INFORMATION The jumper switch must be open if EMS is in use. Fig 12 Jumper switch (e.g. FM457/CMC 920) USER INFORMATION If…
-
Module mounting for control unit CFB 840 | 21
4 Module mounting for control unit CFB 840 This section describes the installation of the function modules CMx in the control unit CFB 840. USER INFORMATION z 4.1 Check that all parts have been delivered. If this is not the case, contact a Bosch Thermotechnology branch. Possible module installations…
-
22 | Module mounting for control unit CFB 840
4.2 Arrangement of modules in the control unit 1 2 Z L 4 Fig 13 3 Slot assignment 1 Slot 1 for an additional module 2 Slot 2 for an additional module 3 Slot B behind the Programmer programming unit 4 Slot A for central module ZM422 (standard version) USER INFORMATION Slot A (Æ Fig. 13, [4]) is…
-
Module mounting for control unit CFB 840 | 23
4.3 Fitting Fig 14 Removing covers 1 Screws 2 Terminal cover RISK OF FATAL INJURY due to electrical current when the control unit is open. z WARNING! Before opening the control unit: Isolate all poles of the power supply and secure against unintentional reconnection. z Unscrew both screws on the…
-
24 | Module mounting for control unit CFB 840
Fig 15 Module installation and removal When fitting a new module z Remove blanking plate in control unit. z Connection cables for sensors or pumps must be routedand provided with terminals before installation of the module (more detailed information can be found in the technical documentation for…
-
Module mounting for control unit CFB 840 | 25
When removing and replacing a module z Disconnect leads for the respective module and fix in standby position (more detailed information can be found in the mounting instructions for control units CFB 840). z Pull module out of the control unit. z Push new module from above into the free slot by…
-
26 | Module mounting for control unit CFB 840
USER INFORMATION The connector clips are locked to prevent slippage. z When removing the terminals press the locking tab upwards. z Position terminal cover and secure with the screws. z Test the module function. More detailed information can be found in the operating and servicing instructions for…
-
Module assembly for control units CFB 9x0 | 27
5 Module assembly for control units CFB 9x0 This section describes as a priority the installation of the function modules CMx in the control units CFB 9x0. USER INFORMATION z 5.1 Check that all parts have been delivered. If this is not the case, contact a Bosch Thermotechnology branch. Possible…
-
28 | Module assembly for control units CFB 9x0
USER INFORMATION The modules FM448/CMB 900-0-10V and FM458/CMC 930 must never be inserted in the same control unit. If you install both modules (FM448/CMB 900-0-10V and FM458/ CMC 930), this leads to an error message on the Programmer display. USER INFORMATION The modules FM457/CMC 920 and FM458/CMC…
-
Module assembly for control units CFB 9x0 | 29
USER INFORMATION Slot A (Æ Fig. 17, [6]) is firmly occupied with one of the central modules ZM432, ZM433, ZM434 or ZM437, and slot B (Æ Fig. 17, [5]) is firmly occupied with the controller module CM431 and the programming unit. Generally, you can assign the additional modules to any free slot (1-4).…
-
30 | Module assembly for control units CFB 9x0
5.3 Fitting Fig 19 Removing covers RISK OF FATAL INJURY due to electrical current when the control unit is open. z WARNING! (2011/08) Before opening the control unit: Isolate all poles of the power supply and secure against unintentional reconnection. z Unscrew both screws (Æ Fig. 19, [1] and [3])…
-
Module assembly for control units CFB 9x0 | 31
Fig 20 Module installation and removal When fitting a new module z Remove blanking plate from slot 1 (Æ Fig. 20) in the control unit. z Connection cables for sensors aor pumps must be routed and provided with terminals before installation of the module (more detailed information can be found in the…
-
32 | Module assembly for control units CFB 9x0
When removing and replacing a module z Disconnect leads for the respective module and fix in standby position (more detailed information can be found in the mounting instructions for control units CFB 9x0). z Pull module out of the control unit. z Push new module from above into the free slot by…
-
Module assembly for control units CFB 9x0 | 33
z Position terminal cover and secure with the screws. z Test the module function. More detailed information can be found in the operating and servicing instructions for control units CFB 9x0. USER INFORMATION If there is no 230 V power supply for the module or one of its 230 V components (e.g.…
-
34 | Module assembly for control units CFB 9x0
Notes (2011/08) Modules for control units CSM 7x0, CFB 8x0 and CFB 9x0
-
Module assembly for control units CFB 9x0 | 35
Notes Modules for control units CSM 7x0, CFB 8x0 and CFB 9x0 (2011/08)
-
Australia
Robert Bosch (Australia) Pty Ltd 1555 Centre Rd Clayton, VIC 3168 Phone 1300 Fax 1300 www.bosch.com.au/hotwater New Zealand Phone 0800 4 Bosch or www.bosch.co.nz C & F Quadrant Ltd. Unit L40 Cherry Orchard Industrial Estate Cherry Orchard, Dublin 10 Tel.: 01.6305700 Fax.: 01.6305706 / 01.6305715…
Схемы, таблицы и рисунки — в просмотре документа выше. Клик по номеру страницы открывает её в просмотре.
Новое в каталогах
-
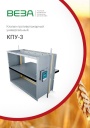
Каталог продукции Веза - Клапан противопожарный универсальный КПУ-3. pdf, 990.15 Kb
Каталог универсального противопожарного клапана КПУ-3: назначение, конструкция, приводы, технические характеристики, габаритные размеры, обозначение при заказе. -
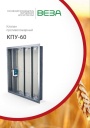
Каталог продукции Веза - Клапан противопожарный КПУ-60. pdf, 839.50 Kb
Каталог противопожарного клапана КПУ-60: назначение, конструкция, приводы, технические характеристики, габаритные размеры, обозначение при заказе. -
Каталог продукции Веза 2026 - Воздухонагреватели газовые ПИОН. pdf, 6.55 Mb
Каталог газовых воздухонагревателей ПИОН: назначение, конструкция и исполнения, технические характеристики, габаритные размеры, обозначение при заказе.
Новое в инструкциях
-
Газовые настенные котлы Baxi серии Quasar D 24. pdf, 1.45 Mb
Газовые настенные котлы Baxi Quasar D 24 (BYH442243970) и Quasar D 24 F (BYH446243970). Каталог запчастей, август 2009 (на английском языке). -
Модули Buderus для систем управления CSM 7x0, CFB 8x0, CFB 9x0. pdf, 646.52 Kb
Модули FM441/CMM 910, FM442/CMM 920, FM443/CMS 910, FM444/CMG 910, FM448/CMB 900, FM455/CMC 900, FM457/CMC 920, FM458/CMC 930 для систем управления Buderus CSM 7x0, CFB 8x0, CFB 9x0. Инструкция по монтажу (на английском языке). -
Функциональный модуль Buderus серии FM 444. pdf, 2.21 Mb
Функциональный модуль Buderus FM444 для подключения альтернативного теплогенератора. Инструкция по сервисному обслуживанию.