

Инструкция на Мультисплит-системы Toshiba серии RAS .... (сервис-мануалы)
Мультисплит-системы Toshiba серии RAS-M10SMUV-E / RAS-M10SMUCV-E, RAS-M13SMUV-E / RAS-M13SMUCV-E, RAS-M16SMUV-E / RAS-M16SMUCV-E. Инструкция по сервисному обслуживанию.
Смотрите также: Инструкция по сервисному обслуживанию →
Загружаем документ…
Текст инструкции
-
FILE NO. A06-015
Revised Oct., 2007 (1) SERVICE MANUAL AIR-CONDITIONER SPLIT TYPE INDOOR UNIT Heat Pump Model Cooling Only Model RAS-M10SMUV-E RAS-M10SMUCV-E RAS-M13SMUV-E RAS-M13SMUCV-E RAS-M16SMUV-E RAS-M16SMUCV-E R410A PRINTED IN JAPAN, Oct.,2007 ToMo
-
1. SAFETY PRECAUTIONS
For general public use Power supply cord of outdoor unit shall be 1.5 mm ² (H07RN-F or 60245IEC66) polychloroprene sheathed flexible cord. • Read this “SAFETY PRECAUTIONS” carefully before servicing. • The precautions described below include the important items regarding safety. Observe them without…
-
• DO NOT INSTALL NEAR CONCENTRATIONS OF COMBUSTIBLE GAS OR GAS VAPORS. FAILURE
TO FOLLOW THIS INSTRUCTION CAN RESULT IN FIRE OR EXPLOSION. • TO PREVENT THE INDOOR UNIT FROM OVERHEATING AND CAUSING A FIRE HAZARD, PLACE THE UNIT WELL AWAY (MORE THAN 2 M) FROM HEAT SOURCES SUCH AS RADIATORS, HEAT REGISTORS, FURNACE, STOVES, ETC. • WHEN MOVING THE AIR-CONDITIONER FOR INSTALLATION…
-
2. SPECIFICATIONS
2-1. Combined Outdoor Unit The outdoor units, which can be combined with 4-way Air Discharge Cassette indoor unit are as described below: 2-1-1. Cooling and Heating Type Outdoor unit type 2-room Multi outdoor unit 3-room Multi outdoor unit 4-room Multi outdoor unit Combined outdoor unit model name…
-
2-2. Indoor Unit
2-2-1. Heat Pump Model Model RAS-M10SMUV-E Indoor unit Electrical characteristics Sound pressure level Air flow Voltage (V) 220/230/240 220/230/240 220/230/240 Running current (A) 0.21/0.20/0.19 0.21/0.20/0.19 0.21/0.20/0.19 Power consumption (W) Power factor (%) High (dB) Medium+ (dB) Medium (dB)…
-
2-2-2. Cooling Only Model
Model RAS-M10SMUCV-E Indoor unit Panel 1 phase, 50Hz 220 to 240 V, 60Hz 220 V Electrical characteristics Sound pressure level Air flow Fan unit Voltage (V) 220/230/240 220/230/240 220/230/240 Running current (A) 0.21/0.20/0.19 0.21/0.20/0.19 0.21/0.20/0.19 Power consumption (W) Power factor (%) High…
-
3. REFRIGERANT R410A
This air conditioner adopts the new refrigerant HFC (R410A) which does not damage the ozone layer. The working pressure of the new refrigerant R410A is 1.6 times higher than conventional refrigerant (R22). The refrigerating oil is also changed in accordance with change of refrigerant, so be careful…
-
Table 3-2-1 Thicknesses of annealed copper pipes
Thickness (mm) Nominal diameter Outer diameter (mm) R410A R22 1/4 6.35 0.80 0.80 3/8 9.52 0.80 0.80 1/2 12.70 0.80 0.80 5/8 15.88 1.00 1.00 2. Joints For copper pipes, flare joints or socket joints are used. Prior to use, be sure to remove all contaminants. a) Flare Joints Flare joints used to…
-
d) Flare Processing
Make certain that a clamp bar and copper pipe have been cleaned. By means of the clamp bar, perform the flare processing correctly. Use either a flare tool for R410A or conventional flare tool. Flare processing dimensions differ according to the type of flare tool. When using a conventional flare…
-
Table 3-2-6 Flare and flare nut dimensions for R22
Dimension (mm) Nominal diameter Outer diameter (mm) Thickness (mm) A B C D Flare nut width (mm) 1/4 6.35 0.8 9.0 9.2 6.5 13 17 3/8 9.52 0.8 13.0 13.5 9.7 20 22 1/2 12.70 0.8 16.2 16.0 12.9 20 24 5/8 15.88 1.0 19.7 19.0 16.0 23 27 3/4 19.05 1.0 23.3 24.0 19.2 34 36 45˚ 6˚ to 4 B A C 43˚ D to 4 5˚…
-
3-3. Tools
3-3-1. Required Tools The service port diameter of packed valve of the outdoor unit in the air-water heat pump using R410A is changed to prevent mixing of other refrigerant. To reinforce the pressure-resisting strength, flare processing dimensions and opposite side dimension of flare nut (For Ø12.7…
-
3-4. Recharging of Refrigerant
When it is necessary to recharge refrigerant, charge the specified amount of new refrigerant according to the following steps. Recover the refrigerant, and check no refrigerant remains in the equipment. When the compound gauge’s pointer has indicated –0.1 Mpa (–76 cmHg), place the handle Low in the…
-
1. Be sure to make setting so that liquid can be charged
2. When using a cylinder equipped with a siphon, liquid can be charged without turning it upside down. It is necessary for charging refrigerant under condition of liquid because R410A is mixed type of refrigerant. Accordingly, when charging refrigerant from the refrigerant cylinder to the equipment…
-
3-5-3. Brazing
2. Characteristics required for flux • Activated temperature of flux coincides with the brazing temperature. • Due to a wide effective temperature range, flux is hard to carbonize. • It is easy to remove slag after brazing. • The corrosive action to the treated metal and brazing filler is minimum. •…
-
4. CONSTRUCTION VIEWS
4-1. Indoor Unit RAS-M10SMUV-E, RAS-M13SMUV-E, RAS-M16SMUV-E RAS-M10SMUCV-E, RAS-M13SMUCV-E, RAS-M16SMUCV-E 595 to 660 Ceiling open dimension Check port ( 450) 200 o Drain-up standing-up size Indoor unit Stand-up 850 or less 1000 or more Check port ( 450) Stand-up 627.5 or less Obustacle Bottom face…
-
5. REFRIGERATING CYCLE DIAGRAM
5-1. Indoor Unit Heating time Cooling time Distributor (Strainer incorporated) Indoor unit TCJ sensor Air heat exchanger TC sensor Refrigerant pipe at liquid side Outer diameter Ø6.4 Refrigerant pipe at gas side Outer diameter A To outdoor unit To outdoor unit Outer diameter A RAS-M10SMUV-E…
-
6. WIRING DIAGRAM
6-1. Indoor Unit 6-1-1. 4-way Air Discharge Cassette Type TA FS CN34 (RED) LM2 LM1 Wireless unit assembly MCC-5053 TC CN104 (YEL) CN102 (RED) CN101 (BLK) MCC-5056 TCJ CN33 (WHI) Control P.C. Board for Indoor Unit CN202 CN201 (WHI) (BLU) CN64 1 (GRN) DC20V DC15V DC12V DC 7 V CN08 2 (WHI) 1 Power…
-
7. SPECIFICATIONS OF ELECTRICAL PARTS
-
8. CONTROL BLOCK DIAGRAM
8-1. Indoor Control Circuit Indoor unit Indoor control P.C. board (MCC-5056) EEPROM Ceiling panel Sensor display P.C. board (MCC-5053)) TA sensor DC5V TC sensor CPU DC12V Louver motor TCJ sensor Driver Float input Outside output Run Warning Ready Thermo. ON Cool/Heat Fan Drain pump CPU Fan motor…
-
9. OPERATION DESCRIPTION
• Detection of inverter input current and current release operation • Over-current detection and prevention operation to IGBT module (Compressor stop function) • Compressor and outdoor fan stop function when serial signal is off (when the serial signal does not reach the board assembly of outdoor…
-
1. Basic
operation Description 1. Operation control Receiving the user’s operation condition setup, the operation statuses of indoor/outdoor units are controlled. 1) The operation conditions are selected by the remote controller as shown in the below. 2) A signal is sent by ON button of the remote…
-
1. Basic
operation Operation flow and applicable data, etc. Description 2. Operating mode selection when performing 2-room operation 1) The outdoor unit operating mode conforms to the instructions of the indoor unit that was pressed first. 2) When combined operation consisting of cooling (dry) and heating…
-
Description
1. Basic operation 4. AUTO operation Selection of operation mode As shown in the following figure, the operation starts by selecting automatically the status of room temperature (Ta) when starting AUTO operation. 1) Detects the room temperature (Ta) when the operation started. 2) Selects an…
-
2. Indoor fan
-
2. Indoor fan
motor control Description <In heating operation> (Heat pump model) 1) When setting the fan speed to L, L+, M, M+ or H on the remote controller, the operation is performed with the constant speed shown in Fig. 3 and Table 1. 2) When setting the fan speed to AUTO on the remote controller, revolution…
-
Description
3. Release protective control by temperature of indoor heat exchanger <In cooling/dry operation> (Prevent-freezing control for indoor heat exchanger) In cooling/dry operation, the sensor of indoor heat exchanger detects evaporation temperature and controls the compressor speed so that temperature of…
-
4. Dain pump
control Operation flow and applicable data, etc. Description In cooling, and dry operation, drain pump is actuated to drain up. 1) During cooling, or drying operation: Drain pump ON. (Includes period during thermo-OFF) 2) When stopping cooling or dry operation, the drain pump also stops. <Operation…
-
7. Louver control
1) Louver position This function controls the air direction of the indoor unit. Description • The position is automatically controlled according to the operation mode (COOL/HEAT). • The set louver position is stored in memory by the microcomputer, and the louver returns to the stored position when…
-
8. ECO
operation Pushing [ECO] button of the remote controller controls the following items. 1) During cooling or drying operation Set temperature: Controls with temperature 1.0°C higher than usual. No. of fan revolutions: For No. of fan revolutions, the automatic operation that M tap is at upper limit is…
-
Description
11. Forced operation stop switch This function controls the indoor units individually. It is connected with cable to the control P.C. board of the indoor unit. The operation of the indoor unit can be forcedly stopped when opening the window by mounting an outside switch (Procured locally) to the…
-
12. Indoor fan
ON output Operation flow and applicable data, etc. Description ON signal is output when the indoor fan is operating. 1. Control items • While the indoor fan is operating, DC12V is output between 1 and 6 of CN60. A fan or etc can be used by synchronized with the indoor unit. 2. Wiring Relay (Procured…
-
13. Select switch on
remote controller 1. Setting remote controller 1. Purpose • Remove the cover, and insert the batteries. This operation is to operate only one indoor unit using one remote • Push the “CHECK” point and “MODE” button at controller. once for changing remote controller setting from “A” to “B”. (Priority…
-
14. Auto restart
function Description Operation flow and applicable data, etc. This product is designed so that, after a power failure, it can restart automatically in the same operating mode as before the power failure. INFORMATION The product was shipped with Auto Restart function in the OFF position. Turn it ON…
-
16. Setting temperature
correction switch Description Operation flow and applicable data, etc. 1. To improve Cooling/Heating effect When only poor cooling/heating effect is obtained due to installation place of the indoor unit or construction of the room, the detection temperature of cooling/heating can be changed. •…
-
9-3. Intermittent Operation Control for Indoor Fans of the Indoor Unit at Thermo-off
Side in Heating Operation While heating operation is executed in two rooms, if room temperature reached the setup temperature in one room and thermo-off occurred, the following operations start. (Refer to the figure below.) 1. The indoor unit of the room (A room) in which thermo-off did not occur…
-
9-4. Remote Controller
9-4-1. Parts Name of Remote Controller 11 High power button (Hi POWER) 1 START/STOP button Push the button to start operation. (A receiving beep is heard.) Push the button again to stop operation. (A receiving beep is heard.) If no sound is heard from the receiver, push the button again. 2 Mode…
-
9-4-2. Names and Functions of Indications on Remote Controller
Display All indications, except for clock time indication, are indicated by pushing the START/STOP button. 1 Transmission mark 6 High power display This transmission mark indicates when the remote controller transmits signals to the indoor unit. Indicates when the High power operation starts. Push…
-
10. INSTALLATION MANUAL
Accessory parts and Parts to be procured locally H Accessory parts Part name Q’ty Shape Usage Installation Manual 1 This manual Wireless remote controller 1 — Remote controller holder 1 — Mounting screws for remote controller holder 3.1 mm (diam.) × 16 mm 1 — Batteries (Manganese) 2 — Heat…
-
1 PRECAUTIONS FOR SAFETY
• Ensure that all Local, National and International regulations are satisfied. • Read this “PRECAUTIONS FOR SAFETY” carefully before Installation. • The precautions described below include the important items regarding safety. Observe them without fail. • After the installation work, perform a trial…
-
• After unpacking the unit, examine for possible damage
• Do not install in a place that might increase the vibration of the unit. • To avoid personal injury (with sharp edges), be careful when handling parts. • Perform installation work properly according to the Installation Manual. Incorrect installation may result in water leakage, electric shock or a…
-
2 SELECTION OF INSTALLATION PLACE
WARNING • The air conditioner must be installed in a location that can support the weight of the unit effectively. If the unit is not installed on a foundation that can support its weight effectively, the unit may fall down, resulting in possible human injury. • Where required ensure that the units…
-
Selection of installation place
In case of continued operation of the indoor unit under high-humidity conditions as described below, dew may condense and water may drop. Especially, high-humidity atmosphere (dew point temperature : 23°C or more) may generate dew inside the ceiling. 1. Unit is installed inside the ceiling with…
-
2 SELECTION OF INSTALLATION PLACE
WARNING Install the air conditioner certainly to sufficiently withstand the weight. If the strength is insufficient, the unit may fall down resulting in human injury. Perform a specified installation work to guard against an earthquake. An incomplete installation can cause accidents by the units…
-
Dimensional view
595 to 660 Ceiling open dimension Check port ( 450) 200 o Drain-up standing-up size Indoor unit Stand-up 850 or less 1000 or more Check port ( 450) Stand-up 627.5 or less Obustacle Bottom face of ceiling Note) As ABS is used for the drain discharge port of the main unit, the vinyl chlor paste cannot…
-
3 INSTALLATION OF INDOOR UNIT
Ceiling opening and installation of hanging bolts • Evaluate and determine the piping and wiring requirements inside the ceiling prior to the hanging of the unit. • After installation place of the indoor unit has been determined, create opening in ceiling and install the hanging bolts. • For the…
-
Installation of indoor unit
• Attach the nut (M10 or W3/8: Procured locally) and washer (34 mm (diam.)) to the hanging bolt. • Put washers at either side of the T-groove on the hanging bracket of the indoor unit in order to hang the unit. • Using a spirit level, check that all four sides are horizontal. (Horizontal positioned…
-
4 DRAIN PIPING WORK
Pipe material / Insulator and size CAUTION • Install the drain piping so that the water drains effectively. The following materials for piping work and insulation are to be procured locally. Hard vinyl chloride pipe socket for VP25 • Apply heat insulation to prevent dew condensation from forming.…
-
Connection of drain pipe
Check the draining • Connect the hard socket (Procured locally) to the hard socket side of the supplied flexible hose which has been installed. • Connect the drain pipes (Procured locally) in turn to the connected hard sockets. When the electric work has finished: REQUIREMENT • Using a adhesive…
-
4 DRAIN PIPING WORK
Thermal insulating process • After checking the draining, wrap the supplied thermal insulation material for the drain connecting part around the flexible hose leaving no clearance from the root of the drain pipe connecting port of the indoor unit. • Wrap the thermal insulation material (procured…
-
5 REFRIGERANT PIPING AND EVACUATING
• Flaring diam. meter size : A (Unit : mm) Refrigerant piping 1. If the outdoor units are to be mounted on a wall, make sure that the supporting platform is sufficiently strong. The platform should be designed and manufactured to maintain its strength over a long period of time, and sufficient…
-
6 EVACUATING
AIR PURGE Evacuate the air in the connecting pipes and in the indoor unit using vacuum pump. Do not use the refrigerant in the outdoor unit. For details, see the manual of vacuum pump. Packed valve handling precautions • Open the valve stem until it touches the stopper. Once it is in contact with…
-
7 ELECTRICAL WORK
WARNING 1. Using the specified wires, ensure to connect the wires, and fix wires securely so that the external tension to the wires do not affect the connecting part of the terminals. Incomplete connection or fixation may cause a fire, etc. 2. Be sure to connect earth wire. (Grounding work) Do not…
-
7 ELECTRICAL WORK
Wire connection REQUIREMENT • Be sure to connect the wires matching the terminal numbers. Incorrect connection causes a trouble. • Be sure to pass the cables through the bushing of wiring connection port of the indoor unit. • Keep a margin (Approx. 100mm) on a wire to hang down the electric parts…
-
Wiring
Wiring diagram 1. Remove a screw and then remove cover of the electric parts box. 2. Strip wire ends (10 mm). 3. Match wire colors with terminal numbers on indoor and outdoor units’ terminal blocks and firmly screw wires to the corresponding terminals. 4. Connect the ground wires to the…
-
8 APPLICABLE CONTROLS
Remote controller selector switch setting • If two indoor units are installed in the same room or adjoining rooms, when the user tries to operate only one unit, both units may receive the same remote controller signal and operate. This can be prevented by changing one of the indoor units and remote…
-
To improve Cooling/Heating effect
When only poor cooling/heating effect is obtained due to installation place of the indoor unit or construction of the room, the detection temperature of cooling/heating can be changed. • Remove the cover of the electric parts box by taking off the mounting screws (3 positions) and pushing the…
-
9 TEST OPERATION
Test operation Check and Test operation Be sure to test the piping connections for gas leak. • Check the flare nut connections, valve stem cap connections and service port cap connections for gas leak with a leak detector or soap water. • To test the system, push and hold RESET button for 10 sec.…
-
11 MAINTENANCE
Prior to maintenance, ensure the power supply is turned off. WARNING CAUTION Cleaning of the air filter and other parts of the air filter involves dangerous work in high places, so be sure to Do not handle the buttons with wet hands as this will cause the risk of electric shock. have a qualified…
-
11. HOW TO DIAGNOSE THE TROUBLE
Table 11-1 No. Troubleshooting Procedure Page 1 First Confirmation 61 2 Primary Judgment 62 3 Judgment by Flashing LED of Indoor Unit (Switch Panel) 62 4 Self-Diagnosis by Remote Controller (Check Code) 63 5 Judgment of Trouble by Every Symptom 66 6 How to Check Simply the Main Parts 70 7 P.C. Board…
-
11-2. Primary Judgment
To diagnose the troubles, use the following methods. (1) Judgment by flashing LED of indoor unit (2) Self-diagnosis by service check remote controller (3) Judgment of trouble by every symptom Firstly use the method (1) for diagnosis. Then, use the method (2) or (3) to diagnose the details of…
-
11-4. Self-Diagnosis by Remote Controller (Check Code)
1. The self-diagnosis by the check code is performed while items B to E blocks are displayed. 2. When turning the operation mode on the remote controller to the service mode, and operating the remote controller, the controller of the indoor unit can self-diagnose operation of the protection circuit…
-
11-4-2. Caution at Servicing
1. After servicing, push the START/STOP button to return to the normal mode. 2. After servicing by the check code, turn off breaker of the power supply, and turn on breaker of the power supply again so that memory in the microcomputer returns the initial status. However, the check codes are not…
-
Operation of diagnosis function
Block distinction Check code Block Outdoor P.C. board Check code Air conditioner status Cause of operation Remarks Judgment and action Inverter over-current protective circuit operates. (Short time) All off Displayed when error is detected. Even if trying operation again, all operations stop…
-
11-5. Judgment of Trouble by Every Symptom
11-5-1. Indoor Unit (Including Remote Controller) (1) Power is not turned on (Does not operate entirely) <Primary check> 1. Is the supply voltage normal? 2. Is the normal voltage provided to the outdoor unit? 3. Is the crossover cable connected properly? 4. Is the fuse (F01) blown? Operation Check…
-
(3) The indoor fan motor does not operate
Turn off the power. Are not there connections errors or disconnection on connectors CN333 and CN334 of indoor unit P.C. board (MCC-5056)? YES Correct connection of connector. NO Remove connectors CN333 and CN334 of indoor unit P.C. board (MCC-5056). Does the fan rotate without trouble when handling…
-
(4) Troubleshooting for remote controller
<Primary check> Check that A or B selected on the main unit is matched with A or B selected on the remote controller. The unit does not beep at all. Operation lamp on indoor unit is not indicated. Press the START/STOP button. Is transmission mark indicated? YES NO Press RESET button on remote…
-
11-5-2. Wiring Failure (Interconnecting and Serial Signal Wire)
(1) Outdoor unit does not operate 1) Is the voltage between and of the indoor terminal block varied? Confirm that transmission from indoor unit to outdoor unit is correctly performed based upon the following diagram. NOTE: • Measurement should be performed 2 minutes and 30 seconds after starting…
-
11-6. How to Check Simply the Main Parts
11-6-1. How to Check the P.C. Board (Indoor Unit) (1) Operating precautions 1) When removing the electric parts box or the P.C. board, be sure to shut off the power supply breaker. 2) When removing the P.C. board, hold the edge of the P.C. board and do not apply force to the parts. 3) When…
-
11-8. Service P.C. Board Selection Information
[4-way air discharge cassette type] Service P.C. board selection corresponded table (Main P.C. board MCC-5056) The indoor control P.C. board (MCC-5056) can correspond to multiple models. When replacing P.C. board assembly, set the DIP switch and jumper according to the following description. Switch…
-
12. DETACHMENTS
12-1. Indoor Unit Ceiling panel: RBC-UM11PG(W)E Preparing work: 1. Before work, be sure to stop the power supply of the air conditioner and turn off switch of the power supply breaker. (Otherwise an electric shock may be caused.) 2. Be sure to put on the gloves when working; otherwise an injury may…
-
Adjust corner cover Procedure Remarks 1. Detachment 1) Perform work of procedure of 1 -1. 2) Turn clockwise screws (4 positions) at the suction port corner until adjust corner cover rises up. NOTE) 1 When you work, keep the torque at below 12N•m. Do not use an electric screwdriver; otherwise the…
-
Control P.C. board Procedure Remarks 1. Detachment 1) Perform works of procedure 1 -1- and 2 -1. 2) Remove the connectors connected from the control P.C. board to other parts. CN33 : Flap motor (5P, White) CN34 : Float switch (3P, Red) CN68 : Drain pump (3P, Blue) CN67 : Terminal block of power…
-
Part name Electric parts box Procedure Remarks 1. Detachment 1) Perform works of procedure 1 -1-and 2 -1. 2) Remove connectors of the lead wire connected to the following connectors of the control P.C. board. CN33 : Flap motor (5P, White) CN34 : Float switch (3P, Red) CN68 : Drain pump (3P, Blue)…
-
Bell mouth Procedure Remarks 1. Detachment 1) Perform work of procedure 1 -1. 2) Take off the lead wires of the drain pump, float switch, and fan motor from the bell mouth. 3) Take off fixing screws of the bell mouth. (Ø4 × 10, 4 pcs.) Fixing claws for lead wires Bell mouth 2. Attachment 1) Mount…
-
Fan motor Procedure Remarks 1. Detachment 1) Perform work of procedure 8 . 2) Take off screws fixed with lead holding bracket of the fan motor. (Ø4 × 10, 2 pcs.) 3) Open wiring holding part of the fan motor lead holding bracket and then take off the fan motor lead wire from the bracket. 4) Take off…
-
Drain pan Procedure Remarks 1) Perform works of procedure 4 -1 and 7 -1. 2) Remove the drain cap and extract drain water accumulated in the drain pan. 2 screws 1. Detachment NOTE) Soc et of drain Socket drain pan When removing the drain cap, be sure to receive drain water with a bucket, etc. 3) Take…
-
Heat exchanger Procedure Remarks 1. Detachment 1) Recover refrigerant gas. 2) Remove the refrigerant pipe at indoor unit side. 3) Perform work of procedure 10 -1. 4) Take off screws (Ø4 × 10, 3 pcs.) fixing the piping cover to remove the piping cover. 5) While holding the heat exchanger, remove…
-
13. EXPLODED VIEWS AND PARTS LIST
13-1. Ceiling Panel RB-B11MC(W)E Location No. Part No. 43109414 4302D003 43180332 43497012 43100322 43107259 43122089 43022451 43122091 Description Location No. Part No. Description 43122092 43122093 43107261 43100412 43107262 43107263 43160580 4306S940 4306A155 Joint, Kit (B) Louver Outlet, Air…
-
14-2. 4-way Air Discharge Cassette Type
-
Location
No. Part No. Description 43120225 43122094 43172185 43121738 43044835 210 43044836 43047691 43049782 43047685 43149355 43149351 43047688 43049776 43047609 43147195 43049697 43170244 43079249 43060029 43163052 43119482 43170248 43119483 43097212 43019904 43179135 43139137 43162056 43177001 43151289…
-
WARNINGS ON REFRIGERANT LEAKAGE
Important Check of Concentration Limit The room in which the air conditioner is to be installed requires a design that in the event of refrigerant gas leaking out, its concentration will not exceed a set limit. The refrigerant R410A which is used in the air conditioner is safe, without the toxicity…
-
TOSHIBA CARRIER CORPORATION
2 CHOME 12-32, KONAN, MINATOKU, TOKYO, 108-0075, JAPAN Copyright © 2007 TOSHIBA CARRIER CORPORATION, ALL Rights Reserved.
Схемы, таблицы и рисунки — в просмотре документа выше. Клик по номеру страницы открывает её в просмотре.
Новое в каталогах
-
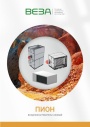
Каталог продукции Веза 2026 - Воздухонагреватели газовые ПИОН. pdf, 6.55 Mb
Каталог газовых воздухонагревателей ПИОН: назначение, конструкция и исполнения, технические характеристики, габаритные размеры, обозначение при заказе. -
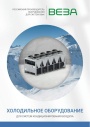
Каталог продукции Веза 2026 - Холодильное оборудование для систем кондиционирования воздуха. pdf, 4.97 Mb
Каталог холодильного оборудования Веза для систем кондиционирования: чиллеры, компрессорно-конденсаторные блоки, фанкойлы и другое оборудование — технические характеристики, габаритные размеры, обозначение при заказе. -
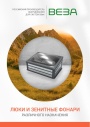
Каталог продукции Веза 2025 - Люки и зенитные фонари различного назначения. pdf, 8.45 Mb
Каталог люков дымоудаления и зенитных фонарей Веза различного назначения: конструкция и исполнения, приводы и автоматика, технические характеристики, габаритные размеры.
Новое в инструкциях
-
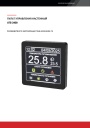
Пульт управления АТБ-2400 для вентиляционных установок Shuft. pdf, 877.42 Kb
Модель АТБ-2400 (производство ООО «АТБ Электроника»). Руководство по эксплуатации настенного пульта: технические характеристики, подключение к контроллеру, главный экран, режимы, уставки, расписание, тревоги, обновление ПО, обслуживание. -
Компактные моноблочные приточные установки Shuft серии CAU W VIM. pdf, 5.89 Mb
Модели: CAU 4000-W VIM, CAU 6000-W VIM. Паспорт (объединённый эксплуатационный документ) установок с водяным нагревателем: описание, массогабаритные показатели, монтаж, схемы электрических соединений, схема обвязки, пусконаладка, обслуживание, неисправности, технические данные. -
Компактные приточные установки Shuft серии AirTube. pdf, 350.53 Kb
Модели: AirTube 160, 200, 250, 315. Паспорт (объединённый эксплуатационный документ): описание устройства, монтаж, подключение электропитания, схемы электрических соединений, обслуживание, поиск и устранение неисправностей, гарантия, технические данные.