

Инструкция на Внутренние настенные блоки мультисплит-системы Sinclair серии HIGH POWER
Внутренние настенные блоки мультисплит-системы Sinclair серии HIGH POWER: MS-H07AIZ, MS-H09AIZ, MS-H12AIZ, MS-H18AIZ, MS-H24AIZ. Руководство пользователя.
Загружаем документ…
Текст инструкции
-
USER'S MANUAL
-
“Original instructions”
-
Explanation of Symbols
DANGER Indicates a hazardous situation that, if not avoided, will result in death or serious injury. WARNING Indicates a hazardous situation that, if not avoided, could result in death or serious injury. CAUTION Indicates a hazardous situation that, if not avoided, may result in minor or moderate…
-
Operation and Maintenance
This appliance can be used by children aged from 8 years and above and persons with reduced physical, sensory or mental capabilities or lack of experience and knowledge if they have been given supervision or instruction concerning use of the appliance in a safe way and understand the hazards…
-
Maintenance must be performed by qualified
professionals. Otherwise, it may cause personal injury or damage. Do not repair air conditioner by yourself. It may cause electric shock or damage. Please contact dealer when you need to repair air conditioner. Do not extend fingers or objects into air inlet or air outlet. It may cause personal…
-
Attachment
Installation must be performed by qualified professionals. Otherwise, it may cause personal injury or damage. Must follow the electric safety regulations when installing the unit. According to the local safety regulations, use qualified power supply circuit and circuit break. Do install the circuit…
-
Do not put through the power before finishing installation
If the supply cord is damaged, it must be replaced by the manufacturer, its service agent or similarly qualified persons in order to avoid a hazard. The temperature of refrigerant circuit will be high, please keep the interconnection cable away from the copper tube. The appliance shall be installed…
-
For the air conditioner with plug, the plug should be
reachable after finishing installation. For the air conditioner without plug, an circuit break must be installed in the line. If you need to relocate the air conditioner to another place, only the qualified person can perform the work. Otherwise, it may cause personal injury or damage. Select a…
-
Parts Name
Display For some model: cooling indicator For some model: power indicator receiver window heating indicator temp. indicator display cooling indicator heating indicator temp. indicator drying display indicator For some model: receiver window power indicator drying indicator display temp. indicator…
-
Note
● This is a general use remote controller, it could be used for the air conditioners with multifunction; For some function, which the model doesn't have, if press the corresponding button on the remote controller that the unit will keep the original running status. ● After putting through power, air…
-
5 FAN button
This button is used for setting Fan Speed in the sequence that goes from AUTO, , , to , then back to Auto. Auto Low speed High speed Medium speed 6 SWING button Press this button to set up &down swing angle, which circularly changes as below: OFF This remote controller is universal. If any command…
-
10 TEMP button
Press this button can see indoor set temperature, indoor ambient temperature or outdoor ambient temperature on indoor unit’s display. Temperature is set circularly by remote controller as below: no display ● When selecting " " by remote controller or no display, temperature indicator on indoor unit…
-
14 TURBO button
Press this button to activate / deactivate the Turbo function which enables the unitto reach the preset temperature in the shortest time. In COOL mode, the unit will blow strong cooling air at super high fan speed. In HEAT mode, the unit will blow strong heating air at super high fan speed. 15 LIGHT…
-
Function introduction for combination buttons
Combination of "TEMP" and "CLOCK" buttons: About Energy-saving Function Press "TEMP" and "CLOCK" simultaneously in COOL mode to start energy-saving function. Nixie tube on the remote controller displays "SE". Repeat the operation to quit the function. Combination of "TEMP" and "CLOCK" buttons: About…
-
Operation guide
1. After putting through the power, press "ON/OFF" button on remote controller to turn on the air conditioner. 2. Press "MODE" button to select your required mode: AUTO, COOL, DRY, FAN, HEAT. 3. Press "+" or "-" button to set your required temperature. (Temperature can’t be adjusted under auto…
-
Emergency operation
If remote controller is lost or damaged, please use auxiliary button to turn on or turn off the air conditioner. The operation in details are as below: air conditioner. When the air conditioner is turned on, it will operate under auto mode. panel aux. button WARNING: Use insulated object to press…
-
Clean and Maintenance
Open panel 1 Pull out the panel to a certain Use dust catcher or water to 3 ● clean the filter. angle as shown in the fig. ● When the filter is very dirty, use the water (below 45℃ ) to clean it, and then put it in a shady and cool place to dry. 2 Remove the filter as indicated in the fig. 4 Install the…
-
Clean and Maintenance
NOTICE: Checking before use-season 1. Check whether air inlets are blocked. 2. Check whether air switch,plug and socket are in good condition. 3. Check whether filter is clean. 4. Check whether drainage pipe is damaged. NOTICE: Checking after use-season 1. Disconnect power supply. 2. Clean filter and…
-
General phenomenon analysis
Please check below items before asking for maintenance. If the malfunction still can’t be eliminated, please contact local dealer or qualified professionals. Phenomenon Check items Solution ● Whether it's interfered severely ● Pull out the plug. Reinsert (such as static electricity, stable the plug…
-
Phenomenon
Air conditioner can’t operate Mist is emitted from indoor unit’s air outlet Set temperature can’t be adjusted Cooling (heating) effect is not good. Check items Solution ● Power failure? ● Wait until power recovery. ● Is plug loose? ● Reinsert the plug. ● Air switch trips off or fuse is burnt out? ●…
-
Phenomenon
Check items Solution Odours are emitted ● Whether there’s odour source, ● Eliminate the odour source. such as furniture and cigarette, ● Clean the filter. etc. Air conditioner operates abnormally suddenly ● Whether there’s interference, such as thunder, wireless devices, etc. ● Disconnect power, put…
-
Error Code
● When air conditioner status is abnormal, temperature indicator on indoor unit will blink to display corresponding error code. Please refer to below list for identification of error code. Error code E5 E8 U8 H6 E6 Troubleshooting It can be eliminated after restarting the unit. If not, please It can…
-
At least 15cm
-
Tools for installation
1 Level meter 2 Screw driver 3 Impact drill 4 Drill head 5 Pipe expander 6 Torque wrench 7 Open-end wrench 8 Pipe cutter 9 Leakage detector 10 Vacuum pump 11 Pressure meter 12 Universal meter 13 Inner hexagon spanner Note: 14 Measuring tape ● Please contact the local agent for installation. ● Don't…
-
Requirements for electric connection
Safety precaution 1. Must follow the electric safety regulations when installing the unit. 2. According to the local safety regulations, use qualified power supply circuit and air switch. 3. Make sure the power supply matches with the requirement of air conditioner. Unstable power supply or incorrect…
-
Step one: choosing installation location
rm it with the client. Step two: install wall-mounting frame 1. Hang the wall-mounting frame on the wall; adjust it in horizontal position with the plastic expansion particles in the holes. 3. Fix the wall-mounting frame on the wall with tapping screws (ST4.2X25TA) and . Step three: open piping hole…
-
Indoor
outdoor Note: ● Pay attention to dust prevention and take relevant safety measures when opening the hole. ● The plastic expansion particles are not provided and should be bought locally. Φ55/ Φ70 5-10 Step four: outlet pipe 2. When select leading out the pipe from left or right, please cut off the…
-
open-end
wrench union nut torque wrench pipe Hex nut diameter Tightening torque (N.m) Φ6 15~20 Φ 9.52 30~40 Φ 12 45~55 Φ 16 60~65 Φ 19 70~75 indoor pipe 4. Wrap the indoor pipe and joint of connection pipe with insulating pipe, and then wrap it with tape. insulating pipe Step six: install drain hose 1.…
-
2. Make the power connection wire go
through the cable-cross hole at the back of indoor unit and then pull it out from the front side. cable-cross hole power connection wire 3. Remove the wire clip; connect the power connection wire to the wiring terminal according to the color; tighten the screw with wire clip. N(1) 2 3 blue black…
-
Step eight: bind up pipe
1. Bind up the connection pipe, power cord and drain hose with the band. indoor unit gas pipe connection pipe drain hose band indoor and outdoor power cord indoor power cord liquid pipe band 3. Bind them evenly. 4. The liquid pipe and gas pipe should be bound separately at the end. drain hose 2.…
-
Check after installation
● Check according to the following requirement after finishing installation. Items to be checked Possible malfunction Has the unit been installed firmly? The unit may drop, shake or emit noise. Have you done the refrigerant leakage test? It may cause insufficient cooling (heating) capacity. Is heat…
-
Pipe expanding method
Note: Improper pipe expanding is the main cause of refrigerant leakage. Please expand the pipe according to the following steps: A: Cut the pipe ● Confirm the pipe length according to the distance of indoor unit and outdoor unit. ● Cut the required pipe with pipe cutter. E: Expand the port ● Expand…
-
NOTE CONCERNING PROTECTION OF
ENVIRONMENT This product must not be disposed of via normal household waste after its service life, but must be taken to a collection station for the recycling of electrical and electronic devices. The symbol on the product, the operating instructions or the packaging indicate such disposal…
Схемы, таблицы и рисунки — в просмотре документа выше. Клик по номеру страницы открывает её в просмотре.
Новое в каталогах
-
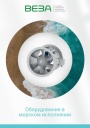
Каталог продукции Веза 2026 - Оборудование в морском исполнении. pdf, 7.62 Mb
Каталог вентиляционного и холодильного оборудования Веза в морском исполнении: радиальные и осевые вентиляторы, кондиционеры КОМПАС-БОВ, компрессорно-конденсаторные агрегаты КОМПАС-ККБ, шкафы управления КОМПАС-ШСАУ — технические характеристики и размеры. -
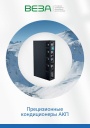
Каталог продукции Веза 2026 - Прецизионные кондиционеры АКП. pdf, 4.90 Mb
Каталог прецизионных кондиционеров АКП: назначение, исполнения, конструкция, технические характеристики, габаритные размеры, обозначение при заказе. -
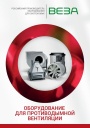
Каталог продукции Веза 2026 - Оборудование для противодымной вентиляции. pdf, 7.85 Mb
Каталог оборудования Веза для противодымной вентиляции: вентиляторы дымоудаления и подпора, противопожарные клапаны, люки и прочее оборудование — назначение, технические характеристики, габаритные размеры.
Новое в инструкциях
-
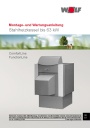
Стальные котлы Wolf серий ComfortLine и FunctionLine до 63 кВт. pdf, 821.74 Kb
Стальные отопительные котлы Wolf до 63 кВт: ComfortLine CNK/CNU, FunctionLine FNK/FNU. Инструкция по монтажу и техническому обслуживанию (на немецком языке). -
Конденсационные жидкотопливные котлы Wolf серии TOB / TOB-TS. pdf, 3.87 Mb
Напольные конденсационные жидкотопливные котлы Wolf TOB и TOB-TS. Инструкция по монтажу (на немецком языке). -
Газовые конденсационные котлы Wolf серии GB-E-20S / GB-EK-20S. pdf, 3.74 Mb
Настенные газовые конденсационные котлы Wolf GB-E-20S (одноконтурный) и GB-EK-20S (двухконтурный). Инструкция по монтажу (на немецком языке).