

Инструкция на Контроллеры OTHER TYPE
Диагностика программного обеспечения MCAC DIAG E. Инструкция по эксплуатации.
Смотрите также: Информационный буклет →
Загружаем документ…
Текст инструкции
-
MIDEA OUTDOOR UNIT
DIAGNOSIS SOFTWARE MANUAL Thank you very much for purchasing our air conditioner, Before using your air conditioner, please read this manual carefully and keep it for future reference.
-
1. INSTALL “NETFRAMEWORK 3.5” FIRST
1) Open “dotnetfx35” folder. 2) Open “wcu” folder. 3) Open “dotNetFramework” folder. 4) Double click to run “dotNetFx35setup.exe” program. 2
-
5) It will show as Fig.1-1 and please wait for software loading
Fig.1-1 6) After loading finished, it will enter installation interface automatically. Click “Install” directly. It shows as Fig.1-2. Fig.1-2 3
-
7) Installation parcel has been packed entirely. It is no need to connect to internet
loading. Installation program can find the required resource automatically. Please wait for installation program to “loading finished”. It shows as Fig.1-3. Fig.1-3 4
-
8) After loading finished, it will install automatically. After loading, it will shows as
Fig.1-4. Fig.1-4 5
-
9) It indicates net Framework has been installed successfully when the screen shows
as Fig.1-5. Please click “Exit” to finish the program installation. Fig.1-5 6
-
2. INSTALL CUSTOMER END
Double click to run “setup.exe” 1) It shows as Fig.2-1. Select to install the required language. Click “Next”. Fig.2-1 7
-
2) It shows as Fig.2-2. Click “Next” directly
Fig.2-2 3) It shows as Fig.2-3. Click “Next” to install. Fig.2-3 8
-
4) Fill in the information as Fig.2-4 shows. Then click “Next”
Fig.2-4 5) Select as Fig.2-5 shows. Install according to the default route. Select as Fig.2-6 shows. You can select the required route to install. Click “Next”. Fig.2-5 9
-
Fig.2-6
6) If the previous step shows as picture 2.5, click “Install” to install directly. It shows Fig.2-7. Fig.2-7 10
-
7) Software installation finished when Fig.2-8 shows. Click “Finish” to finish
installation. It shows as Fig.2-8. Fig.2-8 8) If install according to Fig.2-6 shows, click “Change” to change the installation route. It shows as Fig.2-9A,2.9B. Fig.2-9A 11
-
9) Click “Next”. It shows as Fig.2-10
Fig.2-9B Fig.2-10 12
-
10) Click “Install” to enter installation directly. It shows as Fig.2-11
Fig.2-11 11) It indicates software installation finished when Fig.2-12 shows. Click “Finish” and installation finish. Fig.2-12 13
Схемы, таблицы и рисунки — в просмотре документа выше. Клик по номеру страницы открывает её в просмотре.
Новое в каталогах
-
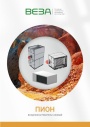
Каталог продукции Веза 2026 - Воздухонагреватели газовые ПИОН. pdf, 6.55 Mb
Каталог газовых воздухонагревателей ПИОН: назначение, конструкция и исполнения, технические характеристики, габаритные размеры, обозначение при заказе. -
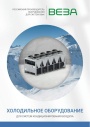
Каталог продукции Веза 2026 - Холодильное оборудование для систем кондиционирования воздуха. pdf, 4.97 Mb
Каталог холодильного оборудования Веза для систем кондиционирования: чиллеры, компрессорно-конденсаторные блоки, фанкойлы и другое оборудование — технические характеристики, габаритные размеры, обозначение при заказе. -
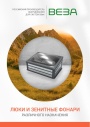
Каталог продукции Веза 2025 - Люки и зенитные фонари различного назначения. pdf, 8.45 Mb
Каталог люков дымоудаления и зенитных фонарей Веза различного назначения: конструкция и исполнения, приводы и автоматика, технические характеристики, габаритные размеры.
Новое в инструкциях
-
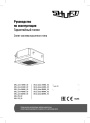
Полупромышленные кассетные сплит-системы Shuft серии SFLC_C. pdf, 11.33 Mb
Модели: SFLC_C/in-18…60HN1_V2, SFLC_C/out-18…60HN1_V2, панели SFLC-PC_V2, SFLC-PS_V2. Руководство по эксплуатации: устройство, проводной пульт, монтаж, электрические схемы подключения, размеры, технические характеристики, устранение неисправностей, протоколы приёмки и тестового запуска, гарантийный талон. -
Полупромышленные канальные сплит-системы Shuft серии SFLC_D. pdf, 10.37 Mb
Модели: SFLC_D/in-18…60HN1_V2, SFLC_D/out-18…60HN1_V2. Руководство по эксплуатации: устройство, проводной пульт, монтаж, электрические схемы подключения, размеры, технические характеристики, устранение неисправностей, протоколы приёмки и тестового запуска, гарантийный талон. -
Полупромышленные напольно-потолочные сплит-системы Shuft серии SFLC_CF. pdf, 8.93 Mb
Модели: SFLC_CF/in-18…60HN1_V2, SFLC_CF/out-18…60HN1_V2. Руководство по эксплуатации: устройство, проводной пульт, монтаж, электрические схемы подключения, размеры, технические характеристики, устранение неисправностей, протоколы приёмки и тестового запуска, гарантийный талон.