

Инструкция на Течеискатель хладагентов TIF ZX Heated Pentode
Электронный течеискатель хладагентов TIFZX с нагреваемым сенсором Heated Pentode: описание, органы управления, порядок работы, обслуживание. Руководство владельца на английском, испанском и французском языках.
Загружаем документ…
Текст инструкции
-
an spx brand
TIFZX Heated Pentode™ Refrigerant Leak Detector Owner’s Manual Manual del propietario Manuel de l’utilisateur
-
table of contents
General Description . . . . . . . . . . . . . . . . . . . . . . . . . . . . . . . . . . 2 Features . . . . . . . . . . . . . . . . . . . . . . . . . . . . . . . . . . . . . . . . . . . . 2 Parts & Controls . . . . . . . . . . . . . . . . . . . . . . . . . . . . . . . . . . . . . 3 Getting Started…
-
general description
Thank you for purchasing the TIFZX Heated Pentode™ Refrigerant Leak Detector. We are proud to offer what we believe is the very best portable electronic leak detector available today. TIFZX offers the greatest sensitivity and fastest response of any portable refrigerant detector available. This is…
-
parts and controls
Fig. 1 12 1. On/Off key 2. Sensitivity high/low key 3. Reset key 4. Alarm key 5. Constant power indicator (1st LED) 6. Visual leak size indicators (2nd-6th LEDs) 3 7. Sensor (not pictured) 8. Flexible probe 9. Probe tip 10. Filter cartridge 11. Charger input jack (underside) 12. NiMH battery pack
-
getting started
WARNING: To prevent personal injury, do not use this Leak Detector in an explosive or combustible atmosphere. Ambient atmosphere is drawn through the probe and sensor, which operate at a very high temperature. The resulting hot mixture of air and combustible gas could explode. Unpacking Unpack the…
-
Once the battery pack has been installed, plug the battery charger into a wall outlet
and connect the charger jack to the unit (see Fig. 3). When correctly connected, the first LED will indicate charging status: Quickly flashing orange = battery charging Slowly flashing green = battery fully charged Slowly flashing red = failed batteries; cannot be recharged Fig. 3 New or completely…
-
operating features
This unit includes operating features designed to increase usability and simplify user interface. Please refer to the Parts and Controls diagram on page 3 to familiarize yourself with the indicators and keypad controls as you proceed through this section. Constant Power Indication The Constant Power…
-
Automatic Circuit/Reset Feature
The unit features Automatic Circuit and Reset functions that set the unit to ignore ambient concentrations of refrigerant. Automatic Circuit - Upon initial power-on and completion of the warm-up, the unit automatically sets itself to ignore the level of refrigerant present at the tip. Only a level…
-
The standard beeping tone is also an indication of sensitivity level
- In High sensitivity the unit emits two quick beeps approximately once every two (2) seconds, in fresh air. - In Low sensitivity the unit emits only one beep, approximately once every two (2) seconds, in fresh air. Sensor Status Indicator The unit’s circuit has the ability to automatically diagnose…
-
Constant
Power Indicator (1st LED) Proportional indicators (2nd – 6th LEDs) Figure 5 When a refrigerant is detected, the visual indicator lights from left to right; first in green, then sequentially in orange, and then sequentially in red. Often, on anything but the smallest leak, the extreme sensitivity of…
-
5. Begin searching for leaks. Move the probe tip toward the suspected leak. The
flexible probe may be shaped to provide access to hard-to-reach areas. NOTE: If the unit has previously been in service, verify the probe tip is not obstructed with dirt, grease, etc., and check the condition of the filter as described in the Maintenance section. 6. If a refrigerant is detected, the…
-
4. In windy areas, even a large leak can be difficult to find. Under these conditions, it is
best to shield the potential leak area from wind or breezes. 5. A leak is a constant source of refrigerant, and when a true leak source is located, it should produce a repeatable alarm each time it is approached. Intermittent (nonrepeatable) alarms are often caused by accumulations of refrigerant…
-
6. Verify an apparent leak as follows
a) Blow shop air into the area of the suspected leak. Repeat the check of the area. In cases of very large leaks, blowing out the area with shop air often helps locate the exact position of the leak. b) Move the probe to fresh air and reset. Then hold the probe tip as close as possible to the…
-
2. When correctly connected, the first LED indicates the charging status
- Quickly flashing orange = battery charging - Slowly flashing green = battery fully charged - Slowly flashing red = batteries failed; cannot be recharged New or completely discharged batteries take approximately two (2) hours to fully recharge. 3. When the LED indicates the batteries are fully…
-
As described in the Operating Features section, the unit’s circuit automatically
diagnoses and indicates the sensor’s status. If an Old Sensor Indication is received, obtain a new sensor as soon as possible. Refer to the Replacement Parts section . If a Failed (or missing) Sensor Indication is received: 1. Remove the flexible probe by firmly grasping it and rotating it…
-
Threaded Bushing
Fig. 8 Pins Sensor 6. Install the flexible probe by threading it clockwise onto the threaded brass bushing around the sensor until it is finger tight. CAUTION: To prevent personal injury and equipment damage, NEVER operate the unit without the flexible probe correctly installed. Sensor…
-
Filter Cartridge and Tip Installation Instructions
1. Remove existing tip and old filter. Replace existing o-rings, if damaged. 2. Verify probe is clean. Use dry shop air to blow out both ends of the probe, if possible. 3. Install new filter cartridge to the probe with pointed ends of the raised ribs oriented toward the tip. See Figure 9. 4. Thread…
-
SPECIFICATIONS
Sensor Technology: Heated PentodeTM (advanced heated diode) Electronic Technology: Microprocessor-controlled circuit, including constant battery and sensor condition detection Sensitivity: Per SAE J1627 criteria; 0.5 oz/yr (14 gr/yr) for R134a, R22, and R12 Ultimate Sensitivity: High…
-
REPLACEMENT PARTS
Several components of the unit are consumable and will eventually require replacement. Additionally, optional accessories for the unit are available through your dealer. Specify the part number below to ensure obtaining the correct part. TIFZX-2 TIFZX-3 TIFZX-3E TIFZX-3J TIFZX-55 TIFZX-6 TIFZX-6E…
-
WARRANTY
This product has been produced to provide unlimited service. Should it become inoperable after the user has performed the recommended maintenance, a no-charge repair or replacement will be made to the original purchaser. This applies to all repairable units that have not been damaged or tampered…
-
TROUBLESHOOTING
Symptom Possible Cause Power indicator LED does not light. (Unit does not switch ON.) Batteries are not charged. Audible alarm does not sound even though LEDs light. MUTE feature is engaged. Constant Power Indicator flashes On and OFF. This is the Old Sensor Indication. All LEDs flash red, and pump…
-
655 Eisenhower Drive
Owatonna, MN 55060-0995 USA Toll free 800 327 5060 llamada gratuita 800 327 5060 appel gratuit 800 327 5060 Fax 866 287 7222 telécopieur 866 287 7222 www.tif.com 553222 Rev C, May 19, 2011 © 2010 SPX
Схемы, таблицы и рисунки — в просмотре документа выше. Клик по номеру страницы открывает её в просмотре.
Новое в каталогах
-
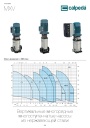
Каталог вертикальных многоступенчатых насосов Calpeda серий MXV, MXVL, MXV EI 2026. pdf, 7.05 Mb
Модели: MXV 25, 32, 40, 50, 65, 80, 100, MXVL 65, 80, MXV EI. Каталог серии: область применения, конструкция и материалы, рабочие характеристики и кривые, габаритные размеры и масса. -

Каталог осевых вентиляторов Shuft серии AXW. pdf, 4.05 Mb
Модели: AXW 4E–8DY с типоразмерами 200–910 в исполнениях S-G, S-T, B-T, B-P. Технический каталог модельного ряда: расшифровка обозначения, характеристики, схемы подключения, аэродинамические графики и габаритные чертежи. -
Каталог продукции Пульсар 2026 - Дренажные насосы. pdf, 3.91 Mb
Каталог продукции Пульсар 2026 - Дренажные насосы
Новое в инструкциях
-
Секционные насосы высокого давления KSB серии Multitec и Multitec-RO. pdf, 8.34 Mb
Модели: Multitec, Multitec-RO, типоразмеры 32–250, исполнения A, B, C, D, E, V. Руководство по эксплуатации и монтажу высоконапорных секционных насосов: техника безопасности, транспортировка и хранение, описание, установка и монтаж, ввод в эксплуатацию, техобслуживание и текущий ремонт, неисправности и их устранение, прилагаемая документация (разрезы, схемы подключения). -
Канальные шумоглушители Shuft серии SCr. pdf, 450.17 Kb
Модели: SCr 100/600 – SCr 500/900 (диаметры 100–500 мм, длина шумоглушащей части 600 и 900 мм). Объединённый эксплуатационный документ (паспорт) на канальные шумоглушители для круглых воздуховодов: назначение и условия эксплуатации, расшифровка обозначения, характеристики и размеры, акустические характеристики, монтаж и эксплуатация, техническое обслуживание, условия гарантии. -

Водонагреватели косвенного нагрева Immergas серии Standart UBS . pdf, 676.07 Kb
Водонагреватели косвенного нагрева Immergas серии Standart UBS150/ Standart UBS 200/ Standart UBS 300 вертикальные из углеродистой стали толщиной 2мм с эмалевым покрытием емкостью 150/200/300 литров. Руководство по эксплуатации.