

Инструкция на Бытовые сплит-системы MDV серии AURORA
Бытовые сплит-системы MDV серии AURORA 3D Inverter. Сервис мануал 2014.
Смотрите также: Инструкция по эксплуатации →
Загружаем документ…
Текст инструкции
-
Aurora 3D Inverter Series
Service Manual 2014
-
1. Precaution
1.1 Safety Precaution To prevent injury to the user or other people and property damage, the following instructions must be followed. Incorrect operation due to ignoring instruction will cause harm or damage. Before service the unit, be sure to read this service manual at first. 1.2 Warning …
-
There is risk of electric shock or fire
Stop operation and close the window in storm or hurricane. If possible, remove the product from the window before the hurricane arrives. There is risk of property damage, failure of product, or electric shock. Do not open the inlet grill of the product during operation. (Do not touch the…
-
Use a firm stool or ladder when cleaning or maintaining the product. Be careful and avoid personal injury. Replace the all batteries in the remote control with new ones of the same type. Do not mix old and new batteries or different types of batteries. There is risk of fire or explosion. Do not…
-
2. Function
Model Names of Indoor/Outdoor Units Capacity 3Dinverter Indoor units Outdoor units 7k MDSA-07HRFN1 MDOA-07HFN1 9k MDSA-09HRFN1 MDOA-09HFN1 12k MDSA-12HRFN1 MDOA-12HFN1 18k MDSA-18HRFN1 MDOA-18HFN1 24k MDSA-24HRFN1 MDOA-24HFN1 Filter 2 ways of drainage Cold catalyst filter Louver Position Memory…
-
3. Dimension
3.1 Indoor Unit Model W D H MDSA-07HRFN1 MDSA-09HRFN1 MDSA-12HRFN1 MDSA-18HRFN1 MDSA-24HRFN1 1080 226 335
-
3.2 Outdoor Unit
-
4. Refrigerant Cycle Diagram
INDOOR OUTDOOR CHECK VALVE (Heating Model only) LIQUID SIDE 2-WAY VALVE CAPILIARY TUBE HEAT EXCHANGE (EVAPORATOR) HEAT EXCHANGE (CONDENSER) T1 Room temp. sensor T2 Evaporator temp. sensor GAS SIDE 4-WAY VALVE 3-WAY VALVE ACCUMULATOR COOLING COMPRESSOR HEATING
-
5. Wiring Diagram
5.1 Indoor Unit
-
6 Installation Details
6.1 Wrench torque sheet for installation Outside diameter Torque Additional tightening torque mm inch N.cm N.cm Ф6.35 1/4 1500(153kgf.cm) 1600(163kgf.cm) Ф9.52 3/8 2500(255kgf.cm) 2600(265kgf.cm) Ф12.7 1/2 3500(357kgf.cm) 3600(367kgf.cm) Ф15.9 5/8 4500(459kgf.cm) 4700(479kgf.cm) Ф19 3/4…
-
6.3 Pipe length and the elevation
The pipe length and refrigerant amount: Pipe size Model MDSA-07HRFN1 MDOA-07HFN1 MDSA-09HRFN1 MDOA-09HFN1 MDSA-12HRFN1 MDOA-12HFN1 MDSA-18HRFN1 MDOA-18HFN1 MDSA-24HRFN1 MDOA-24HFN1 Gas Liquid 3/8’’ 1/4’’ (Ф9.52) (Ф6.35) 3/8’’ 1/4’’ (Ф9.52) (Ф6.35) 3/8’’ 1/4’’ (Ф9.52) (Ф6.35) 1/2’’ 1/4’’ (Ф12.7)…
-
6.4 Installation for the first time
Air and moisture in the refrigerant system have undesirable effects as below: ● ● ● ● Pressure in the system rises. Operating current rises. Cooling or heating efficiency drops. Moisture in the refrigerant circuit may freeze and block capillary tubing. ● Water may lead to corrosion of parts in the…
-
2). Purge the air from the charge hose
Open the valve at the bottom of the cylinder and press the check valve on the charge set to purge the air (be careful of the liquid refrigerant). 3) Put the charging cylinder onto the electronic scale and record the weight. 4) Operate the air conditioner at the cooling mode. 5) Open the valves (Low…
-
and stop it when the gauge indicates 0.1MPa
6). Set the 3-way valve to the closed position immediately Do this quickly so that the gauge ends up indicating 0.3 to 0.5Mpa. Disconnect the charge set, and tighten the 2-way and 3-way valve’s stem nuts. Use a torque wrench to tighten the 3-way valves service port cap to a torque of 18N.m. Be sure…
-
Procedure
1). Connect the charge hose to the charging cylinder, open the 2-way valve and the 3-way valve Connect the charge hose which you disconnected from the vacuum pump to the valve at the bottom of the cylinder. If the refrigerant is R410A, make the cylinder bottom up to ensure liquid charge. 2). Purge…
-
7. Operation Characteristics
Mode Cooling operation Heating operation Drying operation Room temperature 17℃~32℃ (62℉~90℉) 0℃~30℃ (32℉~86℉) 10℃~32℃ (50℉~90℉) Outdoor temperature 0℃~50℃ (32℉~122℉) -15℃~30℃ (5℉~86℉) 0℃~50℃ (32℉~122℉) Temperature CAUTION: 1. If the air conditioner is used beyond the above conditions, certain safety…
-
8. Electronic function
Dispalys ‘ ’ during self clean operation (if aplicable). 8.1 Abbreviation T1: Indoor room temperature T2: Coil temperature of evaporator T3: Coil temperature of condenser T4: Outdoor ambient temperature T5: Compressor discharge temperature 8.2 Display function 8.2.1 Icon explanation on indoor…
-
8.3 Main Protection
8.3.1 Three minutes delay at restart for compressor 1 minute delay for the 1st time stand-up and 3 minutes delay for others. 8.3.2 Temperature protection of compressor top The unit will stop working when the compressor top temp. protector cut off, and will restart after the compressor top temp.…
-
8.4 Operation Modes and Functions
-
to stop the unit per minute
-
Compressor X2 10S X1 10S 4-Way valve If the machine switches mode between heating and cooling, the compressor will keep stopping for 15 minutes and then choose mode according to T1-Ts. If the setting temperature is modified, the machine will choose running function again. 8.4.5 Drying mode Indoor…
-
“timer off” function. And when reaching the
setting time, the timer LED will be off and the AC running mode has not been changed. 8.4.7.7 The setting time is relative time. 8.4.7.8 The AC will quit the timer function when it has malfunction. 8.4.8 Economy function 8.4.8.1 The sleep function is available in cooling, heating or auto mode.…
-
temperature sensor will be shielded, but the
error detective function of room temperature sensor will be still valid. 2) When the follow me function is available, the PCB will control the unit according to the room temperature from the remote controller and the setting temperature. 3) The PCB will take action to the mode change information…
-
9. Troubleshooting
Safety Electricity power is still kept in capacitors even the power supply is shut off. Do not forget to discharge the electricity power in capacitor. Electrolytic Capacitors (HIGH VOLTAGE! CAUTION!) For other models, please connect discharge resistance (approx.100Ω 40W) or soldering iron (plug)…
-
9.1 Indoor Unit Error Display
Operation lamp Timer lamp Display ☆ 1 time X E0 Indoor unit EEPROM parameter error ☆ 2 times X E1 Indoor / outdoor units communication error ☆ 4 times X E3 Indoor fan speed has been out of control ☆ 5 times X E4 Indoor room temperature sensor T1 open circuit or short circuit ☆ 6 times X E5…
-
9.2 Trouble shooting
9.2.1 EEPROM parameter error diagnosis and solution(E0/F4) Error Code E0/F4 Malfunction decision Indoor or outdoor PCB main chip does not receive feedback conditions from EEPROM chip. Supposed causes ● Installation mistake ● PCB faulty Trouble shooting: EEPROM: a read-only memory whose contents can…
-
9.2.2 Indoor / outdoor unit’s communication diagnosis and solution(E1)
Error Code E1 Malfunction decision Indoor unit does not receive the feedback from outdoor unit during conditions 110 seconds and this condition happens four times continuously. Supposed causes ● Wiring mistake ● Indoor or outdoor PCB faulty Trouble shooting:
-
9.2.4 Fan speed has been out of control diagnosis and solution(E3)
Error Code E3 Malfunction decision When indoor fan speed keeps too low (300RPM) for certain time, conditions the unit will stop and the LED will display the failure. Supposed causes ● Wiring mistake ● Fan ass’y faulty ● Fan motor faulty ● PCB faulty Trouble shooting:
-
Index1
1:Indoor or Outdoor DC Fan Motor(control chip is in fan motor) Power on and when the unit is in standby, measure the voltage of pin1-pin3, pin4-pin3 in fan motor connector. If the value of the voltage is not in the range showing in below table, the PCB must has problems and need to be replaced. DC…
-
9.2.4 Refrigerant Leakage Detection diagnosis and solution(EC)
Error Code EC Malfunction decision Define the evaporator coil temp.T2 of the compressor just starts conditions running as Tcool. In the beginning 5 minutes after the compressor starts up, if T2 <Tcool-2℃ does not keep continuous 4 seconds and this situation happens 3 times, the display area will…
-
9.2.5 Open circuit or short circuit of temperature sensor diagnosis and solution(E5)
Error Code E4/E5/F1/F2/F3 Malfunction decision If the sampling voltage is lower than 0.06V or higher than 4.94V, conditions the LED will display the failure. Supposed causes ● Wiring mistake ● Sensor faulty Trouble shooting: Check the connection between temperature sensor and PCB. No Correct the…
-
9.2.6 IPM malfunction or IGBT over-strong current protection diagnosis and solution(P0)
Error Code P0 Malfunction decision When the voltage signal that IPM send to compressor drive chip conditions is abnormal, the display LED will show “P0” and AC will turn off. Supposed causes ● Wiring mistake ● IPM malfunction ● Outdoor fan ass’y faulty ● Compressor malfunction ● Outdoor PCB faulty…
-
9.2.7 Over voltage or too low voltage protection diagnosis and solution(P1)
Error Code P1 Malfunction decision An abnormal voltage rise or drop is detected by checking the conditions specified voltage detection circuit. Supposed causes ● Power supply problems. ● System leakage or block ● PCB faulty Trouble shooting:
-
9.2.8 High temperature protection of compressor top diagnosis and solution(P2)
Error Code P2 Malfunction decision If the sampling voltage is not 5V, the LED will display the failure. conditions Supposed causes ● Power supply problems. ● System leakage or block ● PCB faulty Trouble shooting: Check the air flow system of indoor and outdoor units Yes Clear up the air inlet and…
-
9.2.9 Inverter compressor drive error diagnosis and solution(P4)
Error Code P4 Malfunction decision An abnormal inverter compressor drive is detected by a special conditions detection circuit, including communication signal detection, voltage detection, compressor rotation speed signal detection and so on. Supposed causes Trouble shooting: ● Wiring mistake ● IPM…
-
Main parts check
1. Temperature sensor checking Disconnect the temperature sensor from PCB, measure the resistance value with a tester. Temperature Sensors. Room temp.(T1) sensor, Indoor coil temp.(T2) sensor, Outdoor coil temp.(T3) sensor, Outdoor ambient temp.(T4) sensor, Compressor discharge temp.(T5) sensor.…
-
Appendix 1 Temperature Sensor Resistance Value Table
-
2.Compressor checking
Схемы, таблицы и рисунки — в просмотре документа выше. Клик по номеру страницы открывает её в просмотре.
Новое в каталогах
-
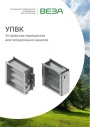
Каталог продукции Веза 2025 - Устройства перекрытия вентиляционных каналов УПВК. pdf, 1012.56 Kb
Каталог устройств перекрытия вентиляционных каналов УПВК: назначение, конструкция, технические характеристики, габаритные размеры, обозначение при заказе. -
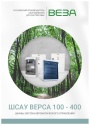
Каталог продукции Веза 2025 - Шкафы систем автоматического управления ШСАУ ВЕРСА 100 - 400. pdf, 16.08 Mb
Каталог шкафов систем автоматического управления ШСАУ ВЕРСА 100–400: назначение, функции, исполнения, схемы, технические характеристики, обозначение при заказе. -
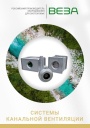
Каталог продукции Веза 2025 - Системы канальной вентиляции. pdf, 8.54 Mb
Каталог оборудования Веза для канальной вентиляции: канальные вентиляторы, нагреватели, охладители, фильтры, шумоглушители, клапаны — технические характеристики и габаритные размеры.
Новое в инструкциях
-
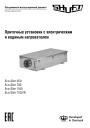
Приточные установки Shuft серии Eco-Slim. pdf, 8.64 Mb
Модели: Eco-Slim 350, 700, 1100, 1100 W. Паспорт (объединённый эксплуатационный документ) установок с электрическим и водяным нагревателем: технические характеристики, монтаж, схема электрического подключения, обслуживание, пульт управления «Oazis», неисправности. -
Канальные фанкойлы Shuft серии SFF. pdf, 1.91 Mb
Модели: SFF-200G50 … SFF-1400G50. Инструкция по эксплуатации средненапорных канальных фанкойлов: внешние виды и размеры, технические характеристики, монтаж, электропроводка, техническое обслуживание, устранение неисправностей. -
Модульные чиллеры с воздушным охлаждением конденсатора Electrolux серии EMACO. pdf, 10.13 Mb
Модели: EMACO-220.V2, EMACO-440.V2. Инструкция по эксплуатации чиллера с воздушным охлаждением конденсатора (модульного блока системы кондиционирования): меры безопасности, технические и эксплуатационные требования, принцип работы, технические характеристики, подъём блока, схема соединения нескольких модулей, вспомогательный электронагреватель, электрическая схема, регулировка и пуск, техническое обслуживание, поиск и устранение неисправностей, инструкция к пульту управления, коды аварийных сигналов, схема подключения внешнего насоса.