

Инструкция на Система Big Multi
Система Big Multi - совместное управление режимами внутренних блоков. Инструкция по монтажу.
Смотрите также: Инструкция по монтажу →
Загружаем документ…
Текст инструкции
-
INSTALLATION MANUAL
Simultaneous operating R407C multi type Refrigerant (PART NO. 9363769012) This air conditioner uses new refrigerant HFC (R407C). For authorized service personnel only. WARNING! This mark indicates procedures which, if improperly performed, might lead to the death or serious injury of the user.…
-
STANDARD PARTS
CONVEYANCE METHOD AND PRODUCT MASS The following installation parts are supplied. Use them as required. Description Q’ty • If you are suspending the unit and conveying it to its installation location, place the ropes under the bottom, using the two places on the front and rear provided for…
-
• Installing continuous units
SELECTING THE MOUNTING POSITION Fig. 3 Decide the mounting position together with the customer as follows. 10 mm or more (1) Install the unit where it will not be tilted by more than 5°. Side 500 mm or more (2) When installing the outdoor unit it may be exposed to strong wind, fasten it securely.…
-
(2) Drain Processing (Reverse cycle model only)
• Remove the rear panel. CONNECTION PIPE REQUIREMENT Fig. 6 Table 1 Diameter Small Large 12.7 mm 28.58 mm Maximum length Maximum height (between indoor and outdoor) 50 mm 30 mm Rear panel • Use 0.7 mm to 1.2 mm thick pipe. • Use pipe with water-resistant heat insulation. • Use pipe that can…
-
Fig. 8
(4) Open the piping and connection cord knockout holes of the desired direction with nippers, etc. After opening a hole in the center of bush, pierce with connection cord. (Rear, Right and Left wiring) Unit: mm 210 Knockout hole Fig. 11 Connection cord (Power supply cord) Bush • If the piping is…
-
Do not bend the pipes in an angle more than 90°
When pipes are repeatedly bent or stretched, the material will harden, making it difficult to bend or stretch them any more. Do not bend or stretch the pipes more than three times. 2. CONNECTING THE PIPING (1) Do not use mineral oil on flared part. Prevent mineral oil from getting into the system as…
-
4. CONNECTION PIPES Fig. 18 (1) Tighten the flare nut of the connection pipe at the outdoor unit valve connector. (2) Seal with the accessory putty so that water does not enter at the top of the pipe insulation installed to the connection pipe. (3) After connecting the pipes, an air tightness test…
-
Fig. 23
BR sheet (included with indoor unit) Hold the torque wrench at its grip, keeping it in the right angle with the pipe as shown in Fig. 21, in order to tighten the flare nut correctly. • Connecting the flange joint pipe. Connection pipe Indoor capillary tube Fig. 21 Branch liquid pipe Fig. 24 Torque…
-
Fig. 27
3. VACUUM PROCESS Tape (1) Do not purge the air with refrigerants but use a vacuum pump to vacuum the installation! There is no extra refrigerant in the outdoor unit for air purging! (2) Use a vacuum pump for R407C exclusively. Using the same vacuum pump for different refrigerant may damage the…
-
Fig. 30
4. ELECTRICAL WIRING Valve B Valve A (1) Before starting work, check that power is not being supplied to the outdoor unit. (2) Match the terminal board numbers and connection cord colors with those of the outdoor unit. Erroneous wiring may cause burning of the electric parts. Cap (Large pipe)…
-
Fig. 35
HOW TO FIX THE CONNECTION CORD AND POWER SUPPLY CORD AT THE CORD CLAMP Control box metal Cord clamp After passing the connection cord and power supply cord through the insulation tube, fasten it with the cord clamp. Fig. 32 Terminal board Cable clip Insulation tube Insulation tube Cord clamp…
-
B. Three Connections
Fig. 38 Outdoor unit For connections between indoor and outdoor units, make connections with the indoor master unit. (Do not make connections with the slave units) N T S R (3) Install the control box metal cover and front panel right. Power supply cord Fig. (N) 2 (N) 2 (N) 2 (N) Indoor unit A…
-
5. AN ERROR DISPLAY
Operation can be checked by lighting and flashing of the LED lamps. Perform judgment in accordance with the following. Table 11 LED LED 1 LED 2 LED 3 LED 4 LED 5 DESCRIPTION OF FAILURE LED DISPLAY Compressor A operation Lighted continuously Pressure switch A faulty (when turning on) 0.1 sec./0.1…
Схемы, таблицы и рисунки — в просмотре документа выше. Клик по номеру страницы открывает её в просмотре.
Новое в каталогах
-

Каталог продукции Веза 2025 - Пункт тепловой индивидуальный БАЗИС, узел регулирующий ВЕКТОР. pdf, 8.85 Mb
Каталог индивидуальных тепловых пунктов БАЗИС, узлов регулирующих ВЕКТОР и блочных тепловых пунктов: назначение, схемы, комплектация, технические характеристики, габаритные размеры. -

Каталог продукции Веза 2024 - Регуляторы переменного расхода воздуха РЕГ-СМАРТ для VAV-систем. pdf, 1.83 Mb
Каталог регуляторов переменного расхода воздуха РЕГ-СМАРТ для VAV-систем: назначение, конструкция, исполнения, технические характеристики, габаритные размеры, обозначение при заказе. -
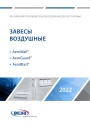
Каталог продукции Веза 2025 - Воздушные завесы. pdf, 4.97 Mb
Каталог воздушных завес Веза AeroWall, AeroGuard, AeroBlast: назначение, конструкция и исполнения, технические характеристики, габаритные размеры, подбор.
Новое в инструкциях
-
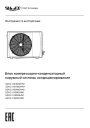
Компрессорно-конденсаторные блоки Shuft серии SDVC. pdf, 5.57 Mb
Модели: SDVC-V03WDHN1, V05WDHN1, V08WDHN1, V10WDHN1, V14WDHN1, V16WDHN1. Инструкция по эксплуатации и руководство по монтажу наружного блока: эксплуатация, обслуживание, диагностика и коды неисправностей, монтаж, трубопроводы хладагента, электроподключение, конфигурация, пробный пуск, технические характеристики. -
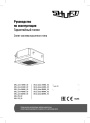
Полупромышленные кассетные сплит-системы Shuft серии SFLC_C. pdf, 11.33 Mb
Модели: SFLC_C/in-18…60HN1_V2, SFLC_C/out-18…60HN1_V2, панели SFLC-PC_V2, SFLC-PS_V2. Руководство по эксплуатации: устройство, проводной пульт, монтаж, электрические схемы подключения, размеры, технические характеристики, устранение неисправностей, протоколы приёмки и тестового запуска, гарантийный талон. -
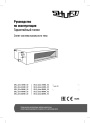
Полупромышленные канальные сплит-системы Shuft серии SFLC_D. pdf, 10.37 Mb
Модели: SFLC_D/in-18…60HN1_V2, SFLC_D/out-18…60HN1_V2. Руководство по эксплуатации: устройство, проводной пульт, монтаж, электрические схемы подключения, размеры, технические характеристики, устранение неисправностей, протоколы приёмки и тестового запуска, гарантийный талон.