

Инструкция на Мульти сплит-системы Midea серии M2O-50E-14-42HFN1-Q
Инверторные мульти сплит-системы Midea серии M2O-50E-14-42HFN1-Q . Руководство по техническому обслуживанию.
Смотрите также: Коды ошибок: 17 кодов →
Загружаем документ…
Текст инструкции
-
MIDEA AIRCONDITIONER
-
1. General information of Outdoor Units
-
2. Features
Outdoor unit Power relay control Low noise air flow system Hydrophilic aluminum fin The hydrophilic fin can improve the heating efficiency at operation mode. 4 way valve control It is only operated in the heating operation mode except defrosting operation. Anti-rust cabinet Valve protection cover It…
-
3. Specification
Outdoor Model Indoor unit combination Power supply Capacity Input Cooling Rated current EER Capacity Input Heating Rated current COP Max. input consumption Max. input current Model Type Brand Capacity Input Compressor Rated current(RLA) Locked rotor Amp(LRA) Thermal protector position Capacitor…
-
Outdoor Model
Indoor unit combination Power supply Capacity Input Cooling Rated current EER Capacity Input Heating Rated current COP Max. input consumption Max. input current Model Type Brand Capacity Input Compressor Rated current(RLA) Locked rotor Amp(LRA) Thermal protector position Capacitor Refrigerant oil…
-
Outdoor Model
Indoor unit combination Power supply Capacity Input Cooling Rated current EER Capacity Input Heating Rated current COP Max. input consumption Max. input current Model Type Brand Capacity Input Compressor Rated current(RLA) Locked rotor Amp(LRA) Thermal protector position Capacitor Refrigerant oil…
-
Outdoor Model
Indoor unit combination Power supply Capacity Input Cooling Rated current EER Capacity Input Heating Rated current COP Max. input consumption Max. input current Model Type Brand Capacity Input Compressor Rated current(RLA) Locked rotor Amp(LRA) Thermal protector position Capacitor Refrigerant oil…
-
Outdoor Model
Indoor unit combination Power supply Capacity Input Rated current EER Capacity Input Heating Rated current COP Max. input consumption Max. input current Model Type Brand Capacity Input Compressor Rated current(RLA) Locked rotor Amp(LRA) Thermal protector position Capacitor Refrigerant oil New Model…
-
4. Dimensions
-
5. Refrigeration Cycle Diagram
5.1 Refrigeration circuit drawing of inverter 1 drive 2 type INDOOR OUTDOOR LIQUID VALVE A EXV A CAPILIARY A CHECK VALVE LIQUID VALVE B EXV B CAPILIARY B CAPILIARY TUBE HEAT EXCHANGE (EVAPORATOR) T4 Ambient temp. sensor T1 Room temp. sensor T3 Condenser temp. sensor HEAT EXCHANGE (CONDENSER) T2B-A…
-
5.3 Refrigeration circuit drawing of inverter 1 drive 4 type
INDOOR OUTDOOR LIQUID VALVE A LIQUID VALVE B EXV A CAPILIARY A EXV B CAPILIARY B CHECK VALVE LIQUID VALVE C LIQUID VALVE D HEAT EXCHANGE (EVAPORATOR) EXV C CAPILIARY C EXV D CAPILIARY D CAPILIARY TUBE T4 Ambient temp. sensor T1 Room temp. sensor T3 Condenser temp. sensor HEAT EXCHANGE (CONDENSER)…
-
6. Wiring diagram
-
7. Indoor units combination
7.1 Indoor unit combination for M2OE-14HFN1-Q One unit Two unit 7 7+7 9+9 9 7+9 9+12 12 7+12 18 7.2 Indoor unit combination for M2OF-18HFN1-Q One unit Two unit 7 7+7 9+9 9 7+9 9+12 12 7+12 9+18 18 7+18 12+12 7.3 Indoor unit combination for M3OE-21HFN1-Q One unit Two unit Three unit 7 7+7 9+9 7+7+7…
-
7.6 Indoor unit combination for M4OB-36HFN1-Q
One unit Two unit Three unit Four unit 7 7+7 9+18 7+7+7 7+9+18 9+9+12 12+12+12 7+7+7+7 7+7+9+24 7+9+12+12 9+9+12+12 9 7+9 9+24 7+7+9 7+9+24 9+9+18 12+12+18 7+7+7+9 7+7+12+12 7+9+12+18 9+9+12+18 12 7+12 12+12 7+7+12 7+12+12 9+9+24 12+12+24 7+7+7+12 7+7+12+18 7+9+18+18 9+12+12+12 18 7+18 12+18 7+7+18…
-
8. Sound Levels
-
9. Installation Details
9.1 Wrench torque sheet for installation Outside diameter Torque Additional tightening torque mm N.cm N.cm Ф6.35 1500(153kgf.cm) 1600(163kgf.cm) Ф9.52 2500(255kgf.cm) 2600(265kgf.cm) Ф12.7 3500(357kgf.cm) 3600(367kgf.cm) 9.2 Connecting the cables The power cord of connect should be selected…
-
● When refrigerant pipe diameter is different from that of outdoor unit union (for 18K indoor unit), additional transfer connector needs to be used on outdoor unit union. Indoor unit Pipe diameter (mm/inch) Liquid 6.35(1/4) 7K9K12K Gas 9.52(3/8) Liquid 6.35(1/4) 18K Gas 12.7(1/2) 24K Liquid…
-
1. Air purging with vacuum pump
(Indoor unit) (Outdoor unit) (Liquid side) Two-way valve Close (Gas side) Three-way valve Manifold valve Compound meter Pressure gauge -0.1MPa Lo Handle Lo Charge hose Close Hi Handle Hi Charge hose Vacuum pump Vacuum pump 1) Completely tighten the flare nuts of the indoor and outdoor units, confirm…
-
2. Air purging by refrigerant
Procedure: 1). Confirm that both the 2-way and 3-way valves are set to the closed position. 2). Connect the charge set and a charging cylinder to the service port of the 3-way valve. 3). Air purging. Open the valves on the charging cylinder and the charge set. Purge the air by loosening the flare…
-
3. Adding the refrigerant if the pipe length >5m
Electronic scale Procedure: 1). Connect the charge hose to the charging cylinder, open the 2-way valve and the 3-way valve. Connect the charge hose which you disconnected from the vacuum pump to the valve at the bottom of the cylinder. If the refrigerant is R410A, make the cylinder bottom up to…
-
9.5 Adding the refrigerant after running the system for many years
Electronic scale Procedure: 1). Connect the charge hose to the 3-way service port, open the 2-way valve and the 3-way valve. Connect the charge hose to the valve at the bottom of the cylinder. If the refrigerant is R410A, make the cylinder bottom up to ensure liquid charge. 2). Purge the air from…
-
9.6 Re-installation while the indoor unit need to be repaired
1. Collecting the refrigerant into the outdoor unit Procedure 1). Confirm that both the 2-way and 3-way valves are set to the opened position Remove the valve stem caps and confirm that the valve stems are in the opened position. Be sure to use a hexagonal wrench to operate the valve stems. 2).…
-
2. Air purging by the refrigerant
Procedure: 1). Confirm that both the 2-way and 3-way valves are set to the closed position. 2). Connect the charge set and a charging cylinder to the service port of the 3-way valve Leave the valve on the charging cylinder closed. 3). Air purging. Open the valves on the charging cylinder and the…
-
9.7 Re-installation while the outdoor unit need to be repaired
1. Evacuation for the whole system Procedure: 1). Confirm that both the 2-way and 3-way valves are set to the opened position. 2). Connect the vacuum pump to 3-way valve’s service port. 3). Evacuation for approximately one hour. Confirm that the compound meter indicates -0.1Mpa. 4). Close the valve…
-
2. Refrigerant charging
Procedure: 1). Connect the charge hose to the charging cylinder, open the 2-way valve and the 3-way valve Connect the charge hose which you disconnected from the vacuum pump to the valve at the bottom of the cylinder. If the refrigerant is R410A, make the cylinder bottom up to ensure liquid charge.…
-
10. Electronic control function
10.1 Abbreviation T1: Indoor ambient temperature T2: Coil temperature of indoor heat exchanger middle. T2B: Coil temperature of indoor heat exchanger outlet(This sensor is located in outdoor unit) T3: Coil temperature of outdoor heat exchanger T4: Outdoor ambient temperature T5: Compressor discharge…
-
A indoor unit capacity 4 B indoor unit capacity 5 C indoor unit capacity 6 D indoor unit capacity 7 E indoor unit capacity 8 A Indoor unit capacity demand code 9 B Indoor unit capacity demand code 10 C Indoor unit capacity demand code 11 D Indoor unit capacity demand code 12 E Indoor unit capacity…
-
Bit4
-
Cooling mode
T4 CoolZone5 CoolZone4 CoolZone3 CoolZone2 CoolZone1 Heating mode: T4 HeatZone4 HeatZone3 HeatZone2 HeatZone1 10.5.5 Indoor / outdoor units communication protection If the indoor units cannot receive the feedback signal from the outdoor units for 2 minutes, the AC will stop and display the failure.…
-
10.5.9 Low outdoor ambient temperature protection
When compressor is off, T4 is be lower than -35℃.for 10s, the AC will stop and display “LP”. When compressor is on, T4 is be lower than -40℃.for 10s, the AC will stop and display “LP”. When T4 is no lower than -32℃.for 10s, the unit will exit protection. Multi DC inverter R410A. Outdoor unit 33
-
11. Troubleshooting
11.1 Indoor unit error code explanation: For MTBI-18HWDN1-Q RUN Timer DEF Alarm DISPLAY DIGITAL TUBE Open or short circuit of T1 temperature sensor ☆ X X X E0 Open or short circuit of T2 temperature sensor X X ☆ X E1 Indoor / outdoor units communication error X ☆ X X E2 Full-water malfunction X X X…
-
Over voltage or over low voltage protection
P1 ☆ 2 Too low ambient temperature protection P3 ☆ 4 Error rotor position protection of compressor P4 ☆ 5 Mode conflict P5 ☆ 6 Low pressure protection of compressor P6 ☆ 7 O (on) X(off) ☆(flash at 2Hz) 11.2 Outdoor unit error code explanation: Display LED STATUS E0 Outdoor EEPROM malfunction E2…
-
11.3 Trouble shooting
11.3.1 For the indoor unit 11.3.1.1 Indoor EEPROM malfunction EEPROM: An electrically erasable programmable read-only memory whose contents can be erased and reprogrammed using a pulsed voltage. 36 Multi DC inverter R410A. Outdoor unit
-
11.3.1.2 Indoor / outdoor units communication error
-
(Vs), is it moving alternately between positive value and negative value? Pic 2: IPM or outdoor main PCB Operating Self-Check Pic 2: IPM or outdoor main PCB Power, Self-Check Operating 38 Multi DC inverter R410A. Outdoor unit
-
PIC 3: Main board LED when power on and unit
standby. . Multi DC inverter R410A. Outdoor unit PIC 4: check point button, Press 1 time for check how many indoor units are connected 39
-
11.3.1.3 indoor unit fan speed has been out of control
Index 1: 1: Indoor AC fan motor Power on and set the unit running in fan mode at high fan speed. After running for 15 seconds, measure the voltage of pin1 and pin2. If the value of the voltage is less than 100V(208~240V power supply)or 50V(115V power supply), the PCB must have problems and need to…
-
DC motor voltage input and output
-
11.3.1.4 Open or short circuit of temperature sensor
Check the connections between temperature sensor and PCB. Are the connections good? No Correct the connections. Yes Measure the resistance value of the sensor via Appendix 1 Is it normal? No Replace the sensor. Yes Replace the indoor PCB 11.3.1.5 Full-water malfunction 42 Multi DC inverter R410A.…
-
11.3.2 For the outdoor unit
11.3.2.1 Outdoor EEPROM malfunction(ODU E0) EEPROM: An electrically erasable programmable read-only memory whose contents can be erased and reprogrammed using a pulsed voltage. Multi DC inverter R410A. Outdoor unit 43
-
11.3.2.2 Communication malfunction between IPM board and outdoor main board(ODU E3)
-
11.3.2.3 Voltage protection(ODU E5)
Voltage protection Check the voltage of outdoor unit power supply, whether the voltage between L(L1) and N (L2) is about 220~240VAC No Check the power supply Yes Check whether the voltage of IPM board P and N is normal? DC277-356V for 18-27KBtu/h; DC277-410V for 36-42KBtu/h No Replace bridge…
-
11.3.2.4 Outdoor unit fan speed has been out of control (E8)
Index 1: 1. Outdoor DC fan motor (control chip is inside fan motor) Power on and when the unit is in standby, measure the voltage of pin1-pin3, pin4-pin3 in fan motor connector. If the value of the voltage is not in the range showing in below table, the PCB must have problems and need to be…
-
Low pressure protection Whether the wiring between the low pressure protector and main control board is connected well or correctly No Connect it well Yes Whether the low pressure protector is broken Method: Disconnect the plug. Measure the resistance of the low pressure protector. If the protector…
-
11.3.2.7 Current protection of compressor (ODU P3)
-
11.3.2.8 Temperature protection of compressor discharge (ODU P4)
Temperature protection of compressor discharge Check whether the compressor discharge temp. is more than 115°C ? No Check whether the refrigerant is leak Yes Yes Stop leaking and add refrigerant No Check whether the connection is right between compressor discharge temp. sensor and PCB according to…
-
11.3.2.9 High temperature protection of condenser (ODU P5)
When outdoor pipe temperature is more than 65°C, the unit will stop, and unit runs again when outdoor pipe temperature less than 52°C. High temperature protection of condenser Check the connection between temperature sensor and PCB. No No Correct the connection Yes Check whether the condenser…
-
11.3.2.10 IPM module protection (ODU P6)
IPM module protection Check whether the voltage range of P‐N on IPM module is normal? DC277‐356V for 18‐28KBtu/h; DC277‐410V for 36‐42KBtu/h No Check whether the input power supply is correct? 208‐230V, 1N, 60Hz No Regulate it to correct, then check whether the system can work normally? Yes No Yes…
-
11.4 Main parts check
1. Temperature sensor checking Disconnect the temperature sensor from PCB, measure the resistance value with a tester. Temperature Sensors. Room temp.(T1) sensor, Indoor coil temp.(T2) sensor, Outdoor coil temp.(T3) sensor, Outdoor ambient temp.(T4) sensor, Compressor discharge temp.(T5) sensor.…
-
Appendix 2 Temperature Sensor Resistance Value Table for T5 (℃--K)
-
2. Compressor checking
Measure the resistance value of each winding by using the tester. Position Blue Red 56 Resistance Value ASN108D22UEZ ASM135D23UFZ ATF235D22UMT ATF310D43UMT 1.57Ω(20℃) 1.75Ω(20℃) 0.75Ω(20℃) 0.65Ω(20℃) Multi DC inverter R410A. Outdoor unit
-
3. IPM continuity check
Turn off the power, let the large capacity electrolytic capacitors discharge completely, and dismount the IPM. Use a digital tester to measure the resistance between P and UVWN; UVW and N. Digital tester (+)Red Normal resistance value P (+)Red (-)Black N U Digital tester (-)Black U ∞ V (Several MΩ)…
Схемы, таблицы и рисунки — в просмотре документа выше. Клик по номеру страницы открывает её в просмотре.
Новое в каталогах
-

Каталог продукции Мовен - Вентиляторы общего и специального назначения (на английском языке). pdf, 13.54 Mb
-
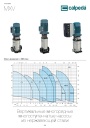
Каталог вертикальных многоступенчатых насосов Calpeda серий MXV, MXVL, MXV EI 2026. pdf, 7.05 Mb
Модели: MXV 25, 32, 40, 50, 65, 80, 100, MXVL 65, 80, MXV EI. Каталог серии: область применения, конструкция и материалы, рабочие характеристики и кривые, габаритные размеры и масса. -

Каталог осевых вентиляторов Shuft серии AXW. pdf, 4.05 Mb
Модели: AXW 4E–8DY с типоразмерами 200–910 в исполнениях S-G, S-T, B-T, B-P. Технический каталог модельного ряда: расшифровка обозначения, характеристики, схемы подключения, аэродинамические графики и габаритные чертежи.
Новое в инструкциях
-
Секционные насосы высокого давления KSB серии Multitec и Multitec-RO. pdf, 8.34 Mb
Модели: Multitec, Multitec-RO, типоразмеры 32–250, исполнения A, B, C, D, E, V. Руководство по эксплуатации и монтажу высоконапорных секционных насосов: техника безопасности, транспортировка и хранение, описание, установка и монтаж, ввод в эксплуатацию, техобслуживание и текущий ремонт, неисправности и их устранение, прилагаемая документация (разрезы, схемы подключения). -
Канальные шумоглушители Shuft серии SCr. pdf, 450.17 Kb
Модели: SCr 100/600 – SCr 500/900 (диаметры 100–500 мм, длина шумоглушащей части 600 и 900 мм). Объединённый эксплуатационный документ (паспорт) на канальные шумоглушители для круглых воздуховодов: назначение и условия эксплуатации, расшифровка обозначения, характеристики и размеры, акустические характеристики, монтаж и эксплуатация, техническое обслуживание, условия гарантии. -
Водонагреватели косвенного нагрева Immergas серии Standart UBS . pdf, 676.07 Kb
Водонагреватели косвенного нагрева Immergas серии Standart UBS150/ Standart UBS 200/ Standart UBS 300 вертикальные из углеродистой стали толщиной 2мм с эмалевым покрытием емкостью 150/200/300 литров. Руководство по эксплуатации.