

Инструкция на Rooftops (крышные кондиционеры) Lennox серии SMART LINEА
Rooftops (крышные кондиционеры) Lennox серии LGC090S, LCC090S, LGA090H, LCA090H, LGA102H, LCA102H, LGC102S, LCC102S, LGA120H, LCA120H, LGC120S, LCC120S, LGC150S, LCC150S. Инструкция по монтажу.
Смотрите также: Руководство по эксплуатации →
Загружаем документ…
Текст инструкции
-
INSTALLATION
INSTRUCTIONS Litho U.S.A. 2003 WARNING Improper installation, adjustment, alteration, ser vice or maintenance can cause property damage, personal injury or loss of life. Installation and ser vice must be performed by a qualified installer, ser vice agency or the gas supplier Table Of Contents…
-
LGA/LGC/LCA/LCC090, 102, 120, & 150 DIMENSIONS − LGA/LGC HEAT SECTION SHOWN
*Reheat coils are factory−installed in Humiditrol units only. OPTIONAL OUTDOOR AIR HOOD (Factory or Field Installed) CONDENSER COIL INTAKE AIR CONDENSER COIL FAN (2) 4 (102) AA 4 (102) 28 (711) CONDENSER COIL INTAKE AIR EVAPORATOR COIL 28 (711) 20 (508) 51/2 (140) CENTER OF GRAVITY BOTTOM POWER/GAS…
-
LGA/LGC090, 102, 120, & 150 PARTS ARRANGEMENT
ECONOMIZER (OPTIONAL) FILTERS (FOUR − 18 X 24 X 2") EVAPORATOR COIL A55 (M1) MAIN CONTROL BOARD CONDENSER FANS BLOWER 120V GFCI OUTLET (OPTIONAL) BLOWER MOTOR REHEAT COIL (Humiditrol ® Units Only) FILTER DRIER DISCONNECT / CIRCUIT BREAKER (FACTORY OR FIELD INSTALLED OPTION) CONDENSATE DRAIN GAS…
-
CAUTION
WARNING Danger of sharp metallic edges. Can cause injury. Take care when servicing unit to avoid accidental contact with sharp edges. Electric shock hazard and danger of explosion. Can cause injury, death or product or property damage. Turn off gas and electrical power to unit before performing any…
-
Installer’s Roof Mounting Frame
Rigging Unit For Lifting Many types of roof frames can be used to install the unit depending upon different roof structures. Items to keep in mind when using the building frame or supports are: 1− The base is fully enclosed and insulated, so an enclosed frame is not required. 2− The frames or…
-
CONDENSATE DRAIN CONNECTION
OUTSIDE OF UNIT GAS PIPE CONNECTION CAULK AROUND CONDENSATE COUPLING NOTE − Allow clearance to open doors when installing condensate piping. Minimum Pitch 1" (25 mm) per 10’ (3 m) of line GROUND JOINT UNION OPEN VENT ÁÁ ÁÁ ÁÁ ÁÁ TO GAS VALVE UNIT MOUNTING FRAME TO GAS SUPPLY FIGURE 3 DRIP LEG…
-
Factory−Installed Options
CAUTION A−Economizer Some soaps used for leak detection are corrosive to certain metals. Carefully rinse piping thoroughly after leak test has been completed. Do not use matches, candles, flame or othe sources of ignition to check for gas leaks. WARNING Danger of explosion. Can cause injury or…
-
5− Slide two filters into bottom filter bracket. Position
filler piece between filters with one end in bottom filter bracket. 6− Install top filter bracket as shown in figure 8. Secure with screws provided. 2− Route power through the bottom power entry area and connect to TB2 or TB13. If unit contains an optional factory−installed circuit breaker or…
-
24 VOLT FIELD WIRING WITH ELECTRONIC AND ELECTRO−MECHANICAL THERMOSTATS
JUMPER TERMINALS 8 & 9 WHEN THERMOSTAT HAS NO NIGHT SETBACK TERMINALS TB1 131415 1920 21 Note − On electro−mechanical thermostats set anticipator at 0.1 amps. A2 NOT ALL TERMINALS ARE FOUND ON ALL THERMOSTATS FIGURE 9 24 VOLT FIELD WIRING WITH IMC SET IN LOCAL THERMOSTAT MODE (ECTO 6.01 OPTION 0)…
-
24 VOLT FIELD WIRING IN ZONE SENSOR MODE (ECTO 6.01 OPTION 1, 2, OR 3)
TB1 1112 Connect shield drain to unit TB1−16 VOUT * * A2 SENSOR *Terminals are located on combination RH/temperature sensors only. A2 sensor is not required when combina tion sensor is used. GND Connect shield drain to unit TB1−7 VIN A91 HUMIDITY SENSOR FIGURE 11 Blower Operation and Adjustments…
-
BLOWER ASSEMBLY
TO INCREASE BELT TENSION 1−Loosen four bolts securing motor base to mounting frame. 2−Turn adjusting bolt to the right, or clockwise, to move the motor outward and tighten the belt. 3−Tighten two bolts on motor pulley side. ALIGN TOP EDGES PARALLEL BEFORE TIGHTENING MOTOR IN PLACE MOTOR BASE…
-
TABLE 3
090, 102, 120, 150 BASE UNIT BLOWER PERFORMANCE BLOWER TABLE INCLUDES RESISTANCE FOR BASE UNIT ONLY WITH DRY INDOOR COIL & AIR FILTERS IN PLACE. FOR ALL UNITS ADD: 1 − Wet indoor coil air resistance of selected unit. 2 − Any factory installed options air resistance (heat section, economizer, etc.) 3…
-
determine the drive number and table 6 to determine the
-
Cooling Start−Up
REFRIGERANT STAGES IMPORTANT−The crankcase heater must be energized for 24 hours before attempting to start compressor. Set thermostat so there is no demand to prevent compressors from cycling. Apply power to unit. (BOTH FANS ARE ENERGIZED WITH A Y1 DEMAND) IMPORTANT Units contain either R22 or…
-
Units charged with R410A refrigerant operate at much higher pressures than R22. The expansion valve and liquid line drier provided with the unit are approved for use with R410A. Do not replace them with components designed for use with R22. R410A refrigerant is stored in a pink cylinder. Manifold…
-
TABLE 11
LCA/LGA102H R22 Outdoor Coil Entering Air Temp 65_F 75_F 85_F 95_F 105_F 115_F CIRCUIT 1 DIs. +10 psig Suct. +5 psig TABLE 15 LGC/LCC120S R410A CIRCUIT 2 Dis. +10 psig Suc. +5 psig Outdoor Coil Entering Air Temp 65_F 75_F 85_F 95_F 105_F 115_F TABLE 12 LGA/LCA102H Humiditrol® Outdoor Coil Entering…
-
F−Charge Verification − Approach Method
1− Using the same thermometer, compare liquid temperature to outdoor ambient temperature. Approach Temperature = Liquid temperature minus ambient temperature. 2− Approach temperature should match values in table 19. An approach temperature greater than value shown indicates an undercharge. An…
-
This unit is equipped with an automatic spark ignition
system. There is no pilot. In case of a safety shutdown, move thermostat switch to OFF and return the thermostat switch to HEAT to reset ignition control. Gas Heat Start−Up (LGA/LGC Units) FOR YOUR SAFETY READ BEFORE LIGHTING WARNING A−Placing Unit In Operation Electric shock hazard. Can cause…
-
3− This appliance is equipped with an ignition device
which automatically lights the burner. Do not try to light the burner by hand. Heating Operation and Adjustments (LGA/LGC Units) A−Heating Sequence of Operation 4− Open or remove the heat section access panel. 1− On a heating demand the combustion air inducer starts immediately. 5− Turn the knob on…
-
2− Remove left burner and check spark gap with
appropriately sized twist drills or feeler gauges. See figure 19. FLAME SENSOR POSITION 3− Remove the right burner and check the alignment of the ignition sensor. See figure 20. 7/32" (6mm) BURNER 4− Replace burners and burner support cap. Secure cap in place with retained screws. 5− The following…
-
Humiditrol® Start−Up And Operation
General Humiditrol units provide a dehumidifying mode of operation. These units contain a reheat coil adjacent to and downstream of the evaporator coil. Reheat coil solenoid valve, L14, routes hot discharge gas from the compressor to the reheat coil. Return air pulled across the evaporator coil is…
-
A67 (RH1) A55 (M1): A56 (EM1) : A57 (C1) A67 (RH1) A67 (RH1) REHEAT CONTROL BOARD YELLOW LED INDICATES OUTPUT TO L14 REHEAT VALVE P175 HUMIDITROL PLUG FLASHING GREEN HEARTBEAT" LED INDICATES NORMAL OPERATION 1 FIGURE 23 1− Make sure RH sensor is wired as shown in figure L14 Reheat Coil Solenoid…
-
Default Reheat Operation
Humiditrol unit reheat control parameter 4.24 is factory−set to option 6. Reheat will operate as shown in table 21 once three conditions are met: Service The unit should be inspected once a year by a qualified service technician. 1− Blower must be operating. CAUTION 2− System must be in occupied…
-
B−Lubrication
All motors are lubricated at the factory. No further lubrication is required. C−Burners (LGA/LGC Units) 1− Periodically examine burner flames for proper appearance during the heating season. 2− Before each heating season examine the burners for any deposits or blockage which may have occurred. 3−…
Схемы, таблицы и рисунки — в просмотре документа выше. Клик по номеру страницы открывает её в просмотре.
Новое в каталогах
-

Каталог продукции Мовен - Вентиляторы общего и специального назначения (на английском языке). pdf, 13.54 Mb
-
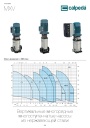
Каталог вертикальных многоступенчатых насосов Calpeda серий MXV, MXVL, MXV EI 2026. pdf, 7.05 Mb
Модели: MXV 25, 32, 40, 50, 65, 80, 100, MXVL 65, 80, MXV EI. Каталог серии: область применения, конструкция и материалы, рабочие характеристики и кривые, габаритные размеры и масса. -

Каталог осевых вентиляторов Shuft серии AXW. pdf, 4.05 Mb
Модели: AXW 4E–8DY с типоразмерами 200–910 в исполнениях S-G, S-T, B-T, B-P. Технический каталог модельного ряда: расшифровка обозначения, характеристики, схемы подключения, аэродинамические графики и габаритные чертежи.
Новое в инструкциях
-
Циркуляционные насосы KSB серии Calio. pdf, 7.92 Mb
Руководство по эксплуатации и монтажу высокоэффективных циркуляционных насосов Calio (оригинальное руководство KSB, док. 1157.821/13): техника безопасности, описание, установка и монтаж, ввод в эксплуатацию, управление и настройка, техобслуживание, неисправности и их устранение, схемы электрических подключений. -
Секционные насосы высокого давления KSB серии Multitec и Multitec-RO. pdf, 8.34 Mb
Модели: Multitec, Multitec-RO, типоразмеры 32–250, исполнения A, B, C, D, E, V. Руководство по эксплуатации и монтажу высоконапорных секционных насосов: техника безопасности, транспортировка и хранение, описание, установка и монтаж, ввод в эксплуатацию, техобслуживание и текущий ремонт, неисправности и их устранение, прилагаемая документация (разрезы, схемы подключения). -
Канальные шумоглушители Shuft серии SCr. pdf, 450.17 Kb
Модели: SCr 100/600 – SCr 500/900 (диаметры 100–500 мм, длина шумоглушащей части 600 и 900 мм). Объединённый эксплуатационный документ (паспорт) на канальные шумоглушители для круглых воздуховодов: назначение и условия эксплуатации, расшифровка обозначения, характеристики и размеры, акустические характеристики, монтаж и эксплуатация, техническое обслуживание, условия гарантии.