

Инструкция на Rooftops (крышные кондиционеры) Lennox серии SMART LINEА
Rooftops (крышные кондиционеры) Lennox серии SMART LINEА LGA 156, LGA 180, LGA 210, LGA 240, LGA 300 S, LCA 156, LCA 180, LCA 210, LCA 240, LCA 300 S. Руководство по эксплуатации.
Смотрите также: Руководство по эксплуатации →
Загружаем документ…
Текст инструкции
-
INSTALLATION
INSTRUCTIONS Litho U.S.A. E2001 WARNING Improper installation, adjustment, alteration, serĆ vice or maintenance can cause property damage, personal injury or loss of life. Installation and serĆ vice must be performed by a qualified installer, serĆ vice agency or the gas supplier LGA156, LCA156 (13…
-
LGA/LCA156, 180, 210, 240, 300S Unit Dimensions - Inches (mm) - LGA Heat Section Shown
Note: All options shown; see Engineering Handbook for standard and optional features. EE 4Ć1/4 (108) 15 (381) OPTIONAL ECONOMIZER DAMPERS (Factory or Field Installed) BOTTOM RETURN AIR OPENING CENTER OF GRAVITY 18 (457) 28 (711) 20 (508) 12Ć3/8 (314) 60Ć1/2 (1537) EVAPORATOR COIL FILTERS 28 (711)…
-
LGA156, 180, 210, 240, 300S PARTS ARRANGEMENT
ECONOMIZER DAMPERS (OPTIONAL) FILTERS (SIX - 24 X 24 X 2") EVAPORATOR COIL CONDENSER FANS BLOWER BLOWER MOTOR CONTROL BOX CONDENSATE DRAIN CONDENSER COILS 120V GFCI OUTLET (Factory-installed option) COMPRESSORS (3 COMPRESSORS ON LGA156 & 180 UNITS) BURNERS DISCONNECT (Factory-installed option) GAS…
-
Shipping and Packing List
ÇÇÇÇÇÇÇ ÇÇÇÇÇÇÇ ÇÇÇÇÇÇÇÇÇÇ ÇÇÇÇÇ ÇÇÇÇÇ ÇÇÇ ÇÇÇÇÇ ÇÇÇ ÇÇÇÇÇ ÇÇÇ ÇÇÇÇÇÇÇÇÇÇÇÇÇÇÇ ÇÇÇÇÇÇÇ ÇÇÇÇÇÇÇ SERVICE CLEARANCES Package 1 of 1 contains: 1- Assembled unit Check unit for shipping damage. Receiving party should contact last carrier immediately if shipping damage is found. General These instructions…
-
3- Frame or supports must be high enough to prevent
any form of moisture from entering unit. Recommended minimum frame height is 14" (356mm). Rigging Unit For Lifting Rig unit for lifting by attaching four cables to holes in unit base rail. See figure 2. 4- Duct must be attached to the roof mounting frame and not to the unit. Supply and return…
-
Condensate Drains
OUTSIDE OF UNIT GAS PIPE CONNECTION Make drain connection to the 1" N.P.T. drain coupling provided on unit. A trap must be installed between drain connection and an open vent for proper condensate removal. See figure 3. It is sometimes acceptable to drain condensate onto the roof or grade; however…
-
Pressure Test Gas Piping
High Altitude Derate When pressure testing gas lines, the gas valve must be disconnected and isolated. Gas valves can be damaged if subjected to more than 0.5 psig (3.48kPa). See figure 7. Units may be installed at altitudes up to 2000 feet (610 m) above sea level without any modification. At…
-
INTAKE HOOD
CAULK EACH END (FIELD INSTALLED) UNIT TOP SEAL HOOD STIFFENER HOOD TOP HOOD TOP HOOD SIDE SIDE FILTER BRACKETS LONGER TOP FILTER BRACKET SHORTER TOP FILTER BRACKET FIGURE 8 Electrical Connections HOOD SIDE VIEW POWER SUPPLY HOOD TOP SEAL Do not apply power or close disconnect switch until…
-
Locate thermostat approximately 5 feet (1524mm)
above the floor in an area with good air circulation at average temperature. Avoid locating the room thermostat where it might be affected by: 24 VOLT FIELD WIRING WITH ELECTRONIC AND ELECTRO-MECHANICAL THERMOSTATS JUMPER TERMINALS 8 & 9 WHEN THERMOSTAT HAS NO NIGHT SETBACK TERMINALS -drafts or dead…
-
BLOWER ASSEMBLY
TO INCREASE CFM TO INCREASE BELT TENSION LOOSEN ALLEN SCREW & TURN PULLEY CLOCKWISE 1-Loosen four screws securing blower motor to sliding base. TO DECREASE CFM 2-Turn adjusting screw to the left, or counterĆ clockwise, to move the motor downward and tighten the belt. TURN PULLEY COUNTERCLOCKWISE…
-
G-Field-Furnished Blower Drives
For field-furnished blower drives, use tables 2 and 3 to determine BHP and RPM required. Reference table 4 to determine the drive number and table 5 to determine the manufacturer's model number. TABLE 2 MINIMUM AIR VOLUME REQUIRED FOR USE WITH OPTIONAL ELECTRIC HEAT D-LCA156H units require 5200 cfm…
-
TABLE 3
FACTORY INSTALLED OPTIONS/FIELD INSTALLED ACCESSORY AIR RESISTANCE Total Resistance Ċ inches water gauge (Pa) Air Volume Wet Indoor Coil Gas Heat Exchanger (LGA Models) Std. Heat High Heat Electric Heat (LCA/LHA Models) .03 (7) .01 (2) .04 (10) .05 (12) .04 (10) .01 (2) .04 (10) .06 (15) .04 (10)…
-
TABLE 5
MANUFACTURER'S NUMBERS DRIVE NO NO. DRIVE COMPONENTS FIXED SHEAVE ADJUSTABLE SHEAVE BELTS (2 REQUIRED) BROWNING NO. OEM PART NO. BROWNING NO. OEM PART NO. BROWNING NO. OEM PART NO. A 1VP40x7/8 79J0301 1BK95X1-7/16 80K1601 BX59 59A5001 1 1VP50x7/8 P-8-2187 BK100x1Ć7/16 39L1301 BX62 57A7701 2…
-
LGA AND LCA156 & 180 REFRIGERANT CIRCUITS
STAGE 1 CONDENSER COIL EVAPORATOR COIL STAGE 2 EVAPORATOR COIL STAGE 1 EVAPORATOR COIL STAGE 2 CONDENSER COIL FIGURE 13 LGA AND LCA210, 240, & 300S REFRIGERANT CIRCUITS EVAPORATOR COIL STAGE 2 EVAPORATOR COIL STAGE 1 EVAPORATOR COIL STAGE 2 CONDENSER COIL FIGURE 14 Page 13 STAGE 1 CONDENSER COIL
-
D-Refrigerant Charge and Check
WARNING-Do not exceed nameplate charge under any condition. This unit is factory charged and should require no further adjustment. If the system requires charge, reclaim the charge, evacuate the system, and add required nameplate charge. NOTE - System charging is not recommended below 60°F (15°C).…
-
TABLE 12
LGA/LCA240H NORMAL OPERATING PRESSURES Outdoor CIRCUIT 1 CIRCUIT 2 CIRCUIT 3 CIRCUIT 4 Coil EnĆ tering Air Temp DIs +10 psig Suc +5 psig 65_F 75_F 85_F 95_F 105_F 115_F Coil EnĆ tering Air Temp DIs +10 psig Suc +5 psig Dis +10 psig Suc +5 psig DIs +10 psig Suc +5 psig DIs +10 psig Suc +5 psig 65_F…
-
LGA/LCA210, 240 & 300S
WARNING Condenser fans 1 and 2 are energized on a Y1 cooling demand. An increased Y2 demand will energize condenser fans 3 and 4. The C1 (A56) controller de-energizes condenser fan 2 and the C2 (A59) controller de-energizes condenser fan 4 when outdoor temperature drops below 55°F (13°C). Condenser…
-
WHITE RODGERS 36C76 GAS VALVE
INLET PRESSURE TAP (SIDE) STAGE 2 MANUAL MANIFOLD PRESSURE ADJUSTMENT SCREW UNDER CAP MANIFOLD PRESSURE TAP (SIDE) 1- If using an electromechanical thermostat, set to the lowest setting. 2- Before performing any service, turn off all electrical power to the appliance. 3- Open or remove the heat…
-
TYPICAL HEAT SECTION
CAUTION Label all wires prior to disconnection when servicĆ ing controls. Wiring errors can cause improper and dangerous operation. Verify proper operation after servicing. The unit should be inspected once a year by a qualified service technician. BURNER SUPPORT CAP LEFT BURNER FIGURE 18 2- Remove…
-
c- Remove burner retaining bracket and lift burners
from orifices. d-Clean as necessary and replace burners. Refit retaining brackets. Make sure that burner heads line up correctly. Spark gap on ignition electrode must be properly set. Refer to Heating Adjustment section. Replace access panel. HEAT EXCHANGER ASSEMBLY COMBUSTION AIR INDUCER HEAT…
Схемы, таблицы и рисунки — в просмотре документа выше. Клик по номеру страницы открывает её в просмотре.
Новое в каталогах
-

Каталог продукции Мовен - Вентиляторы общего и специального назначения (на английском языке). pdf, 13.54 Mb
-
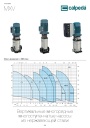
Каталог вертикальных многоступенчатых насосов Calpeda серий MXV, MXVL, MXV EI 2026. pdf, 7.05 Mb
Модели: MXV 25, 32, 40, 50, 65, 80, 100, MXVL 65, 80, MXV EI. Каталог серии: область применения, конструкция и материалы, рабочие характеристики и кривые, габаритные размеры и масса. -

Каталог осевых вентиляторов Shuft серии AXW. pdf, 4.05 Mb
Модели: AXW 4E–8DY с типоразмерами 200–910 в исполнениях S-G, S-T, B-T, B-P. Технический каталог модельного ряда: расшифровка обозначения, характеристики, схемы подключения, аэродинамические графики и габаритные чертежи.
Новое в инструкциях
-
Циркуляционные насосы KSB серии Calio. pdf, 7.92 Mb
Руководство по эксплуатации и монтажу высокоэффективных циркуляционных насосов Calio (оригинальное руководство KSB, док. 1157.821/13): техника безопасности, описание, установка и монтаж, ввод в эксплуатацию, управление и настройка, техобслуживание, неисправности и их устранение, схемы электрических подключений. -
Секционные насосы высокого давления KSB серии Multitec и Multitec-RO. pdf, 8.34 Mb
Модели: Multitec, Multitec-RO, типоразмеры 32–250, исполнения A, B, C, D, E, V. Руководство по эксплуатации и монтажу высоконапорных секционных насосов: техника безопасности, транспортировка и хранение, описание, установка и монтаж, ввод в эксплуатацию, техобслуживание и текущий ремонт, неисправности и их устранение, прилагаемая документация (разрезы, схемы подключения). -
Канальные шумоглушители Shuft серии SCr. pdf, 450.17 Kb
Модели: SCr 100/600 – SCr 500/900 (диаметры 100–500 мм, длина шумоглушащей части 600 и 900 мм). Объединённый эксплуатационный документ (паспорт) на канальные шумоглушители для круглых воздуховодов: назначение и условия эксплуатации, расшифровка обозначения, характеристики и размеры, акустические характеристики, монтаж и эксплуатация, техническое обслуживание, условия гарантии.